Wigging out.
As mentioned in the Bigger is Better? blog post, our newest Queen Anne has rather a large head. Sixteen inches in fact. This presented a challenge for the wig maker and hair stylist since the current wig stock contains nothing over a size 14.
Knowing the Boss's mission to purchase only thrifted, bargain basement, or garage sale finds, the decision was made to cannibalize two available wigs of the same colour and style.
A wig cap was also required, though the Boss wasn't sure she wanted the wig to be removable or not.
Despite her wingeing, the shop proceeded with the work. The following is the process report from the Hair department:
https://georgianera.wordpress.com/wp-content/uploads/2023/02/british-museum.jpg
Hello from the Hair Department!
Our first task was to make and fit a wig cap for Adelaide. A piece of black stretch fabric from a pair of worn out leggings looked the best choice for the job. The legs already had elastic stitched in the bottom and it was useful to have two, just in case.
After some pulling and tweaking and pinning to a less than cooperative Adelaide, the cap ended up looking a bit like an old fashioned beanie with some elastic around the edge. We took a tea break after wig wrestling and forgot to take a photo. But this drawing shows basically what the finished cap looked like.
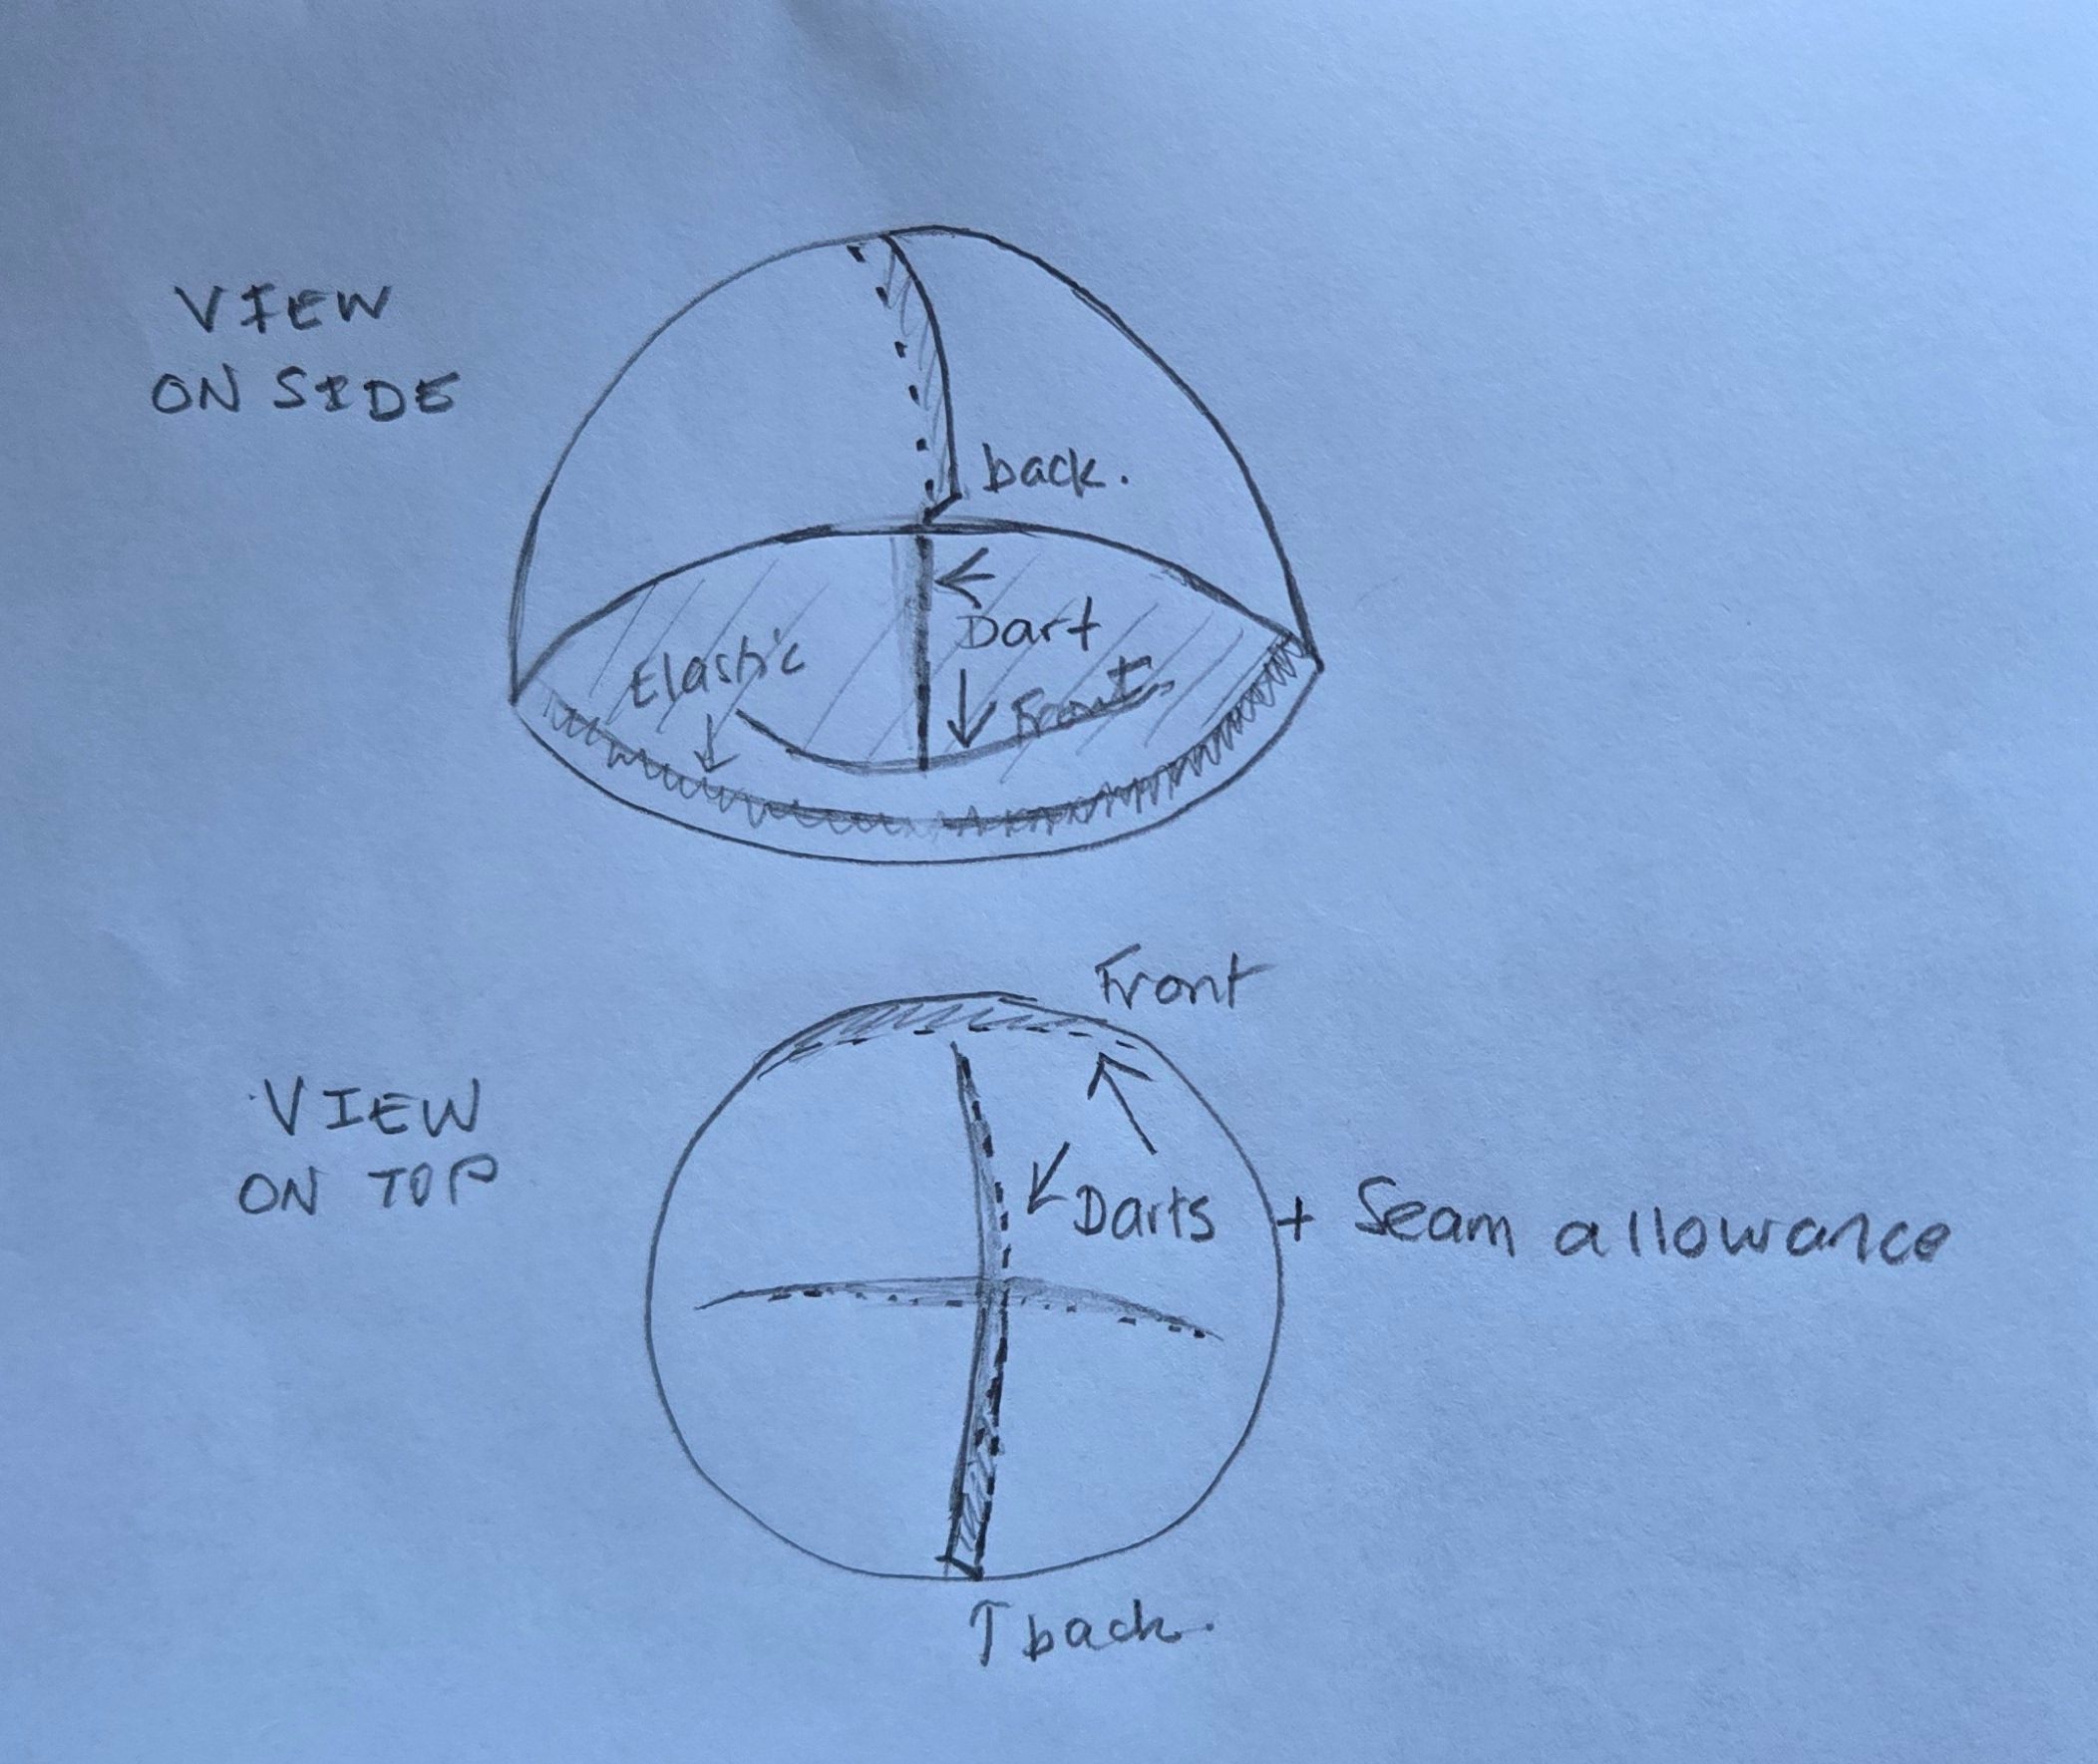
The right side of cap is against Adelaide's head for a smooth finish and look. The raw darts and seam allowances are hidden by the wig itself. The narrow elastic had been stitched to fold under naturally and so is not visible when the wig is worn. You can see all this in the picture below.
The two wigs available were a size 9 and a size 14. If you are a wig dresser, you may be shocked by the following, but really, there was no choice it the matter
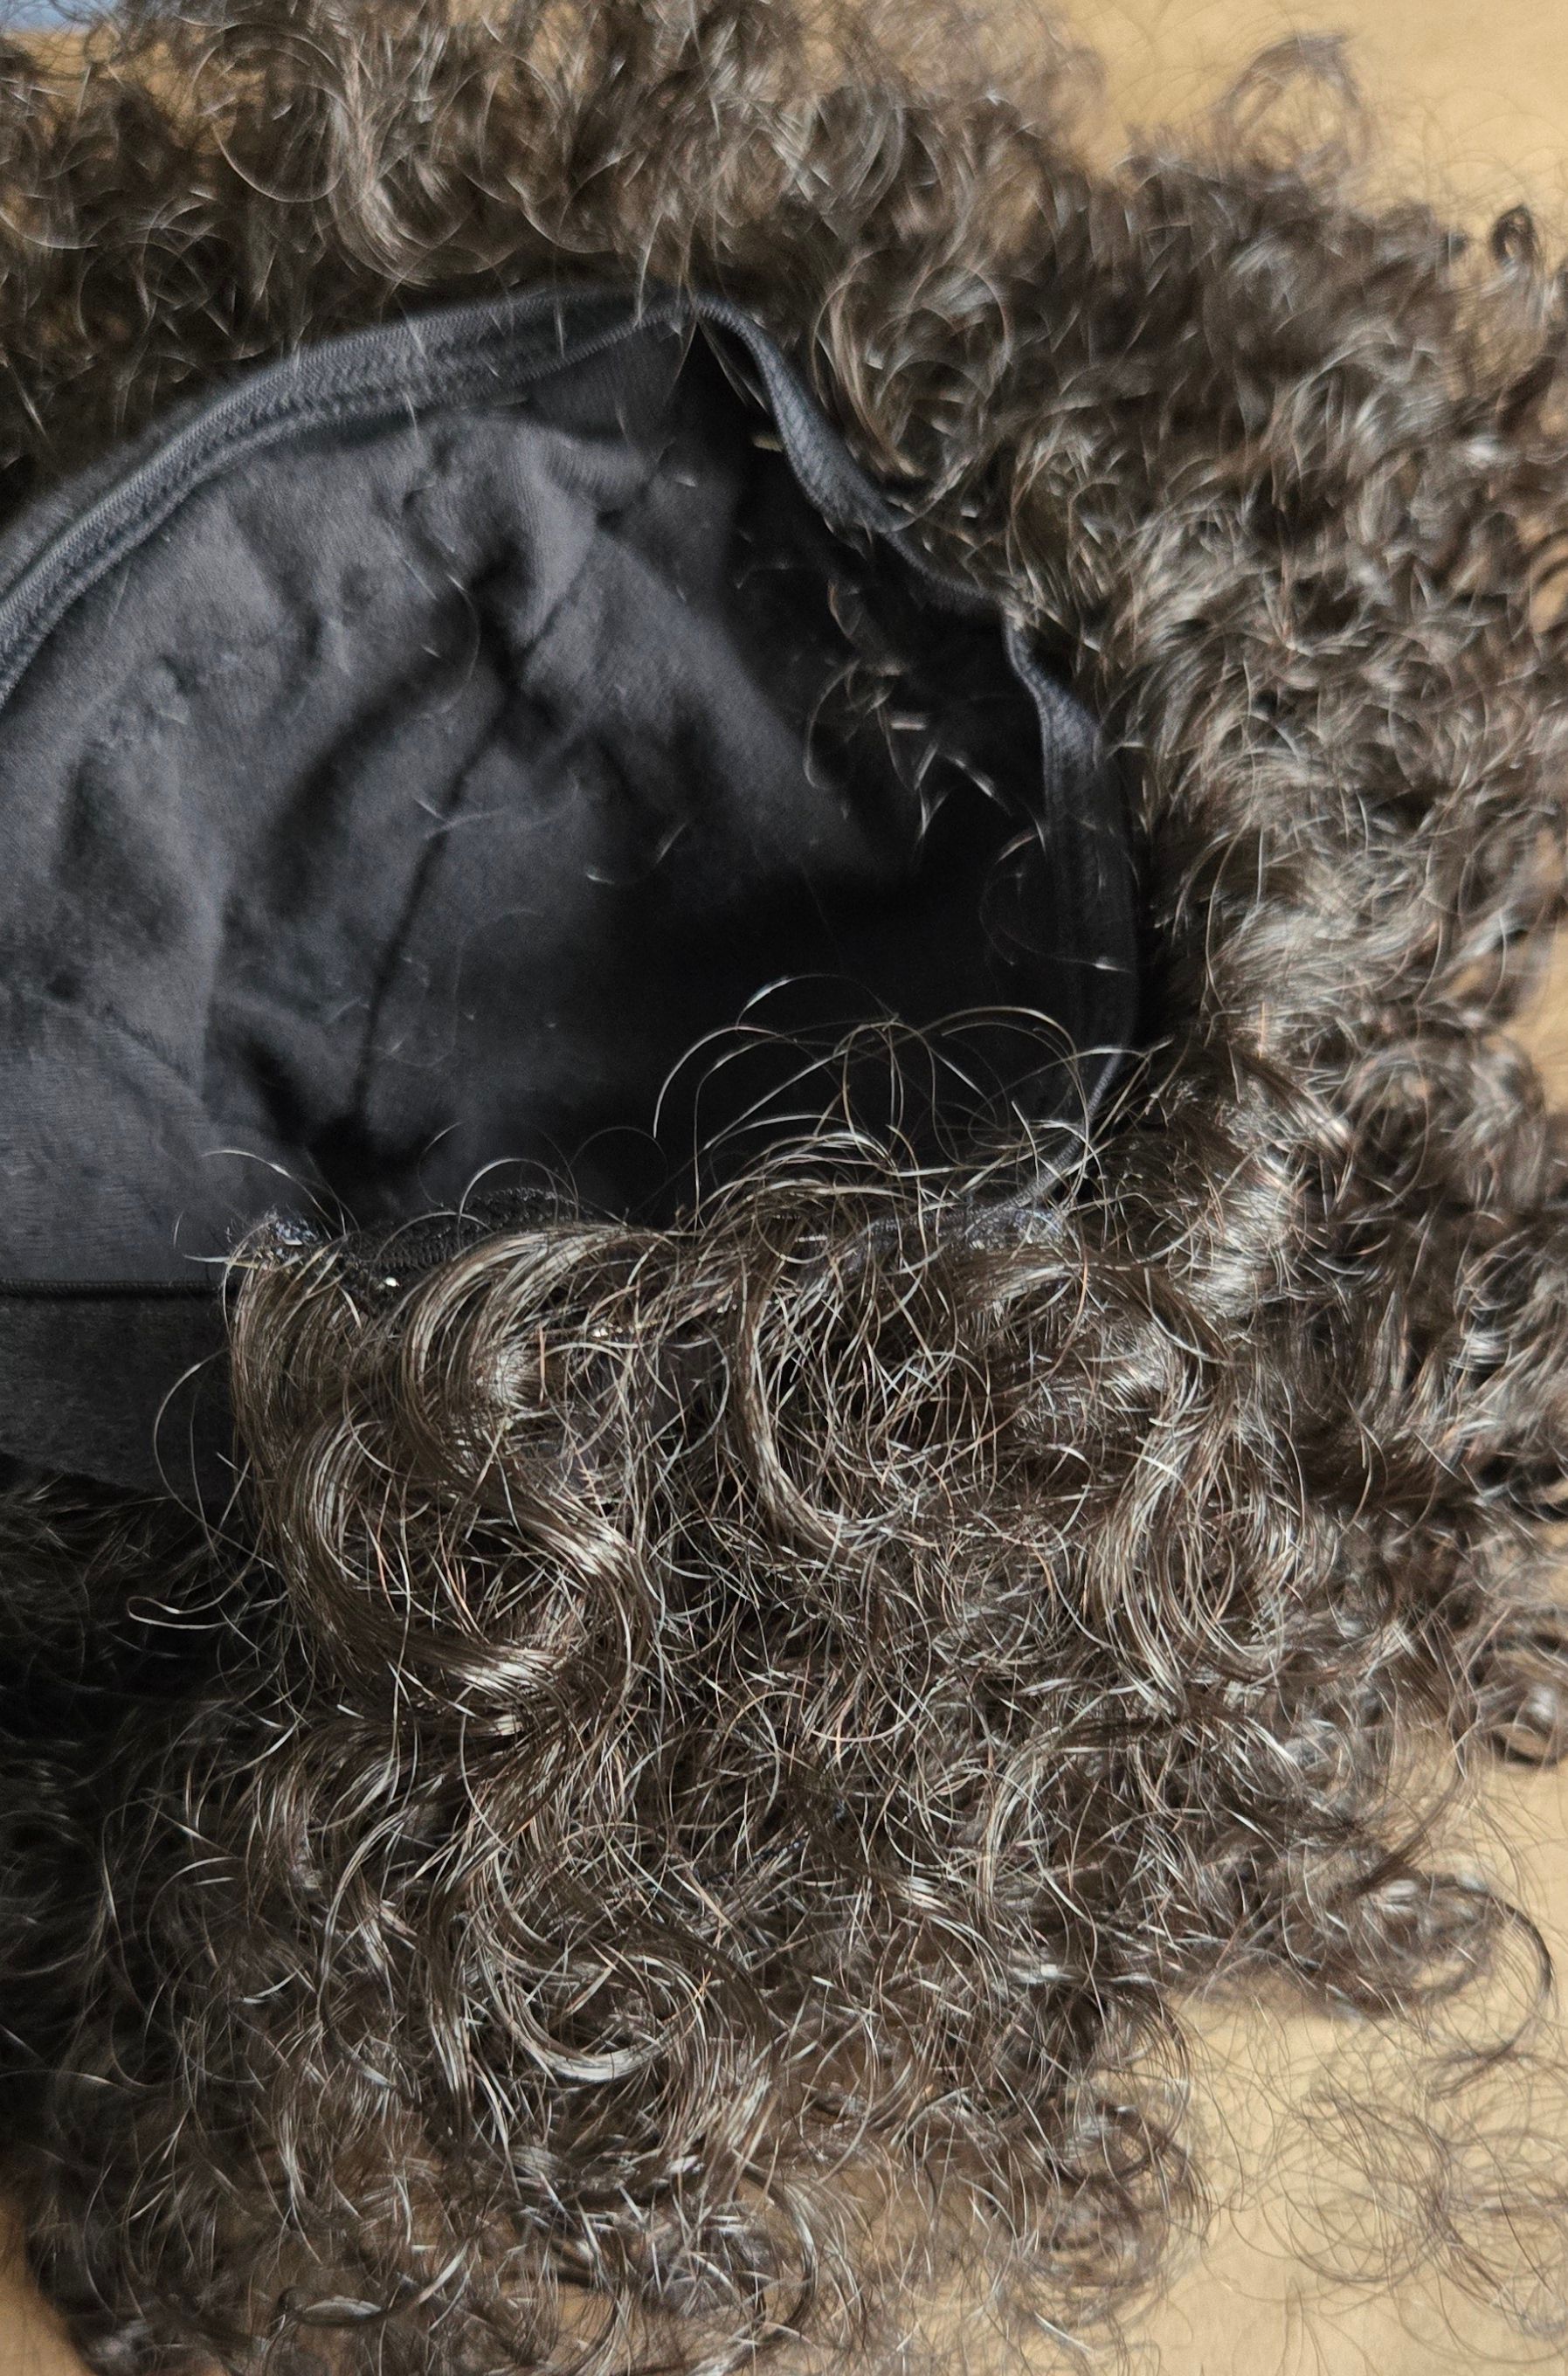
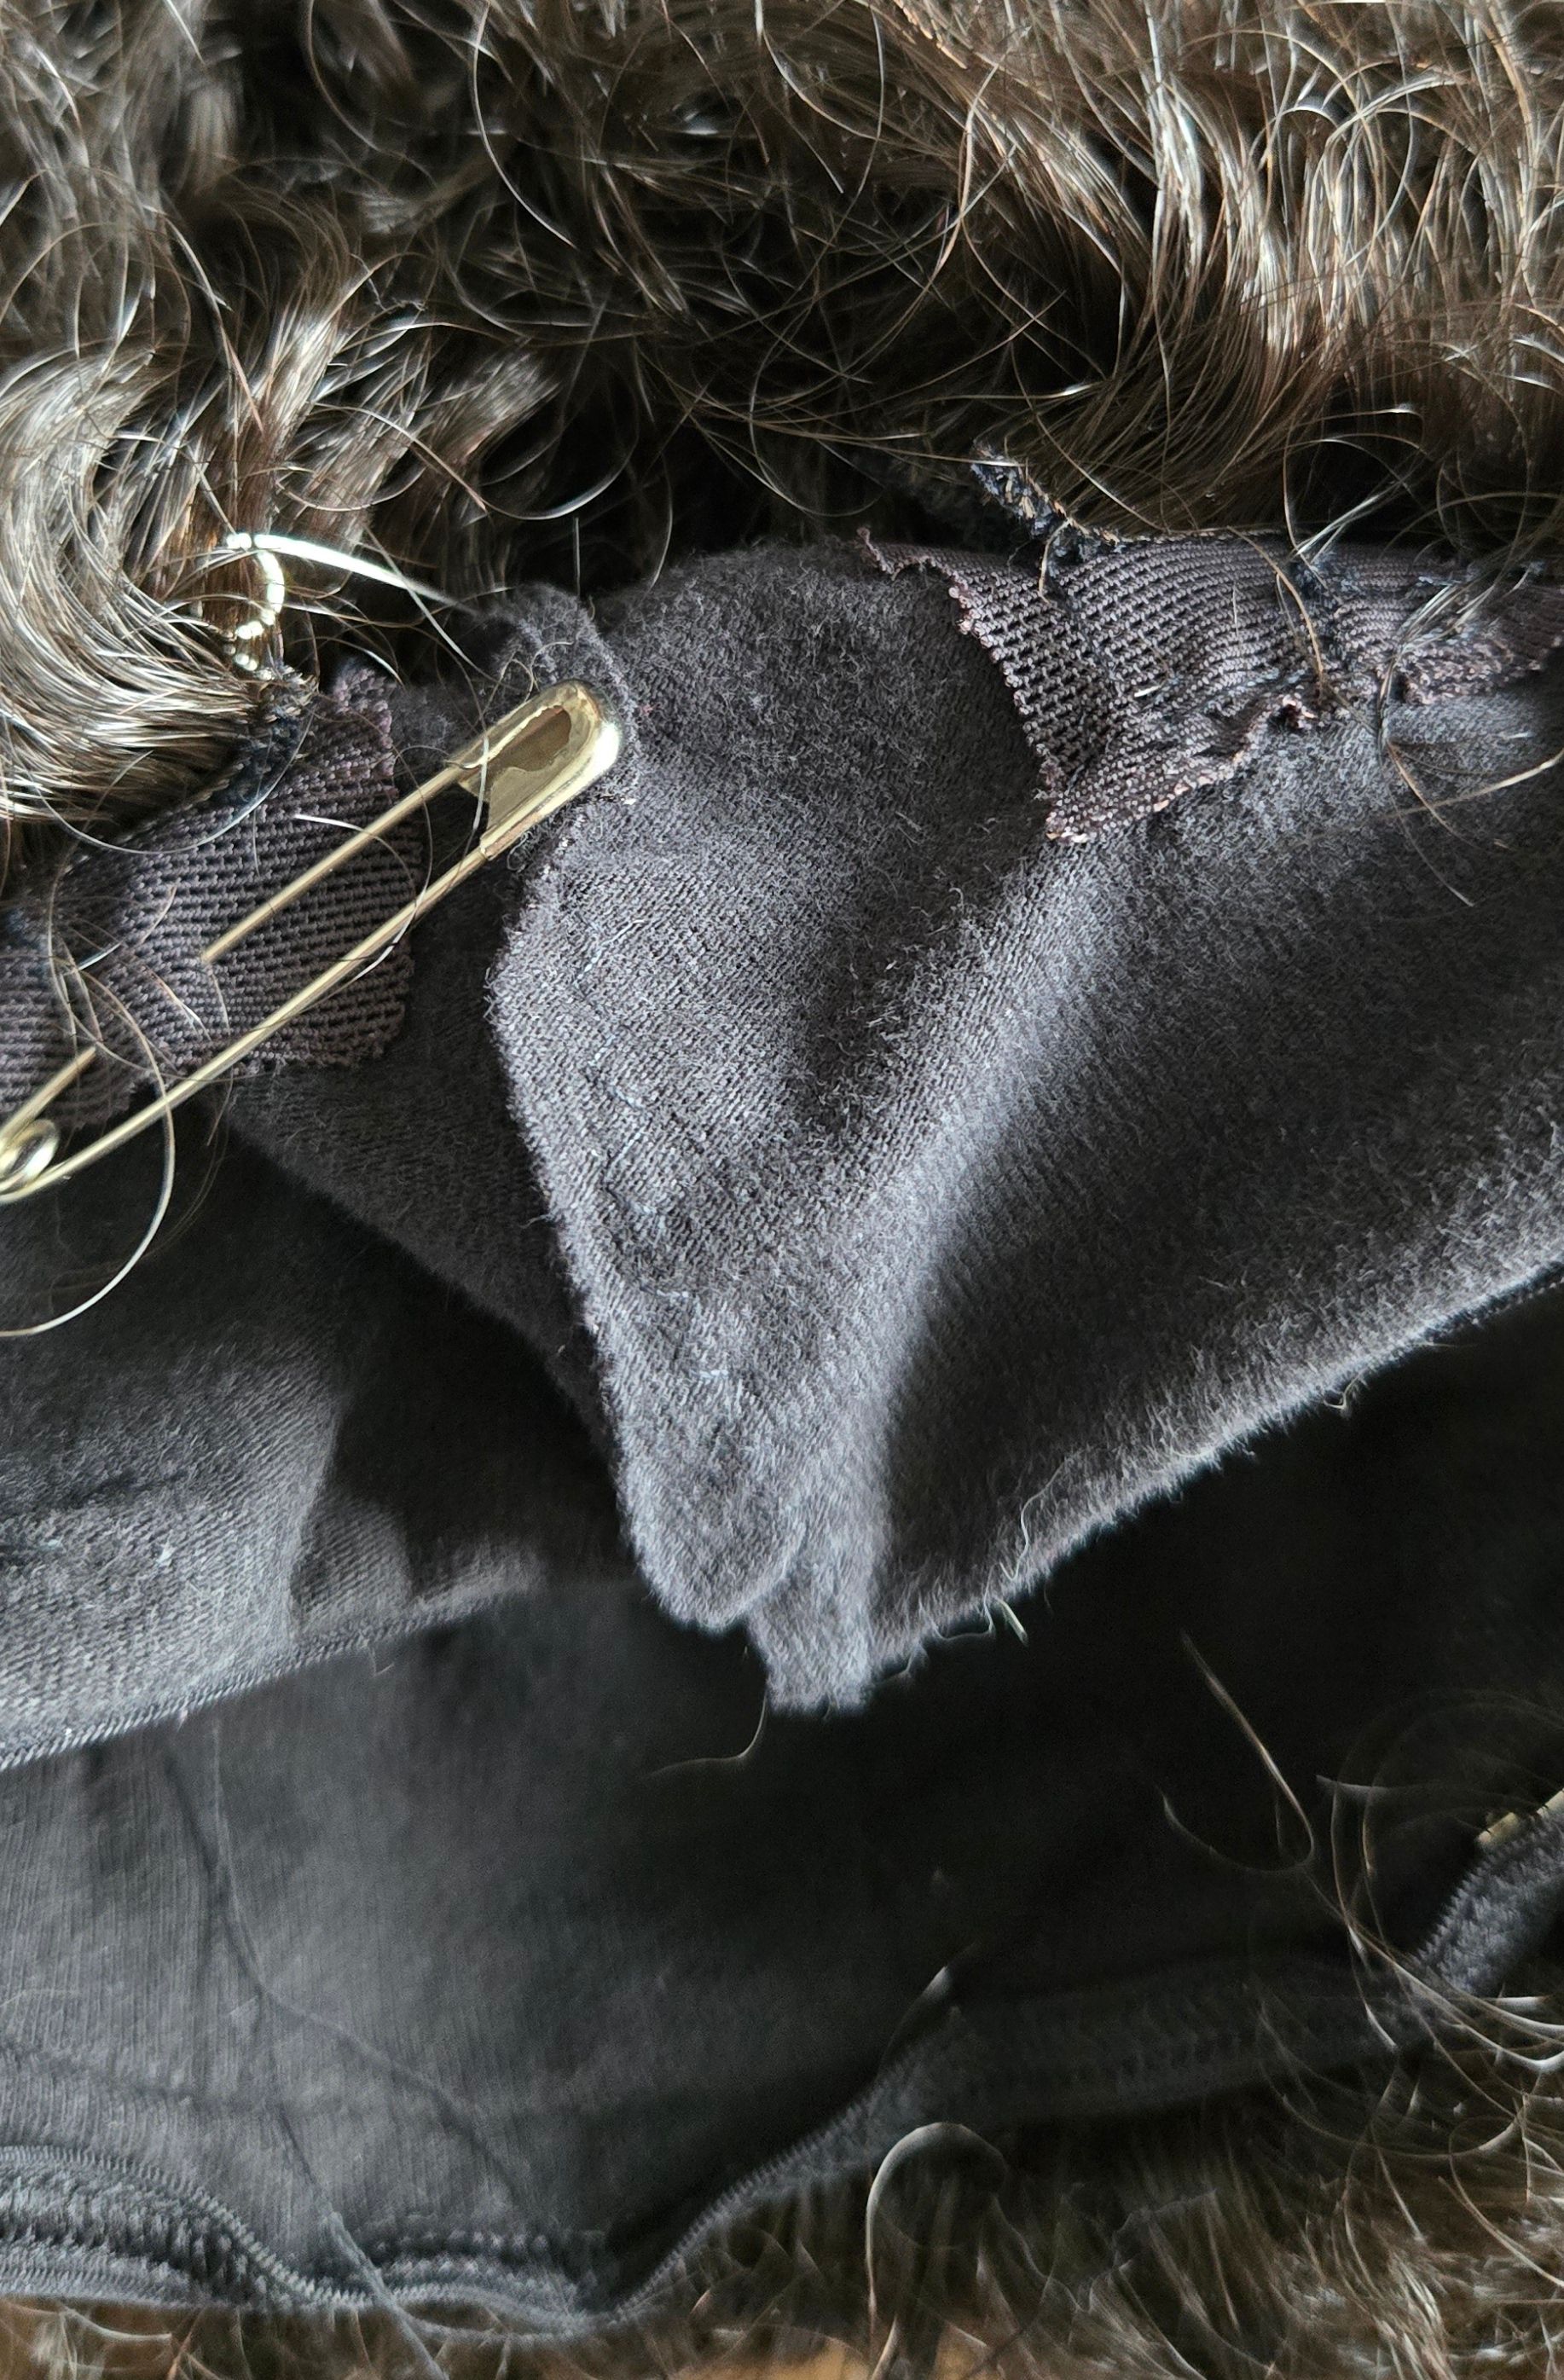
First, the size 14 wig cap was split to create a bigger fit. Some of the wefts had to be carefully removed before doing this. The picture below shows one of the splits. You can see the dart made after a fitting to bring the wig cap up farther from the face.
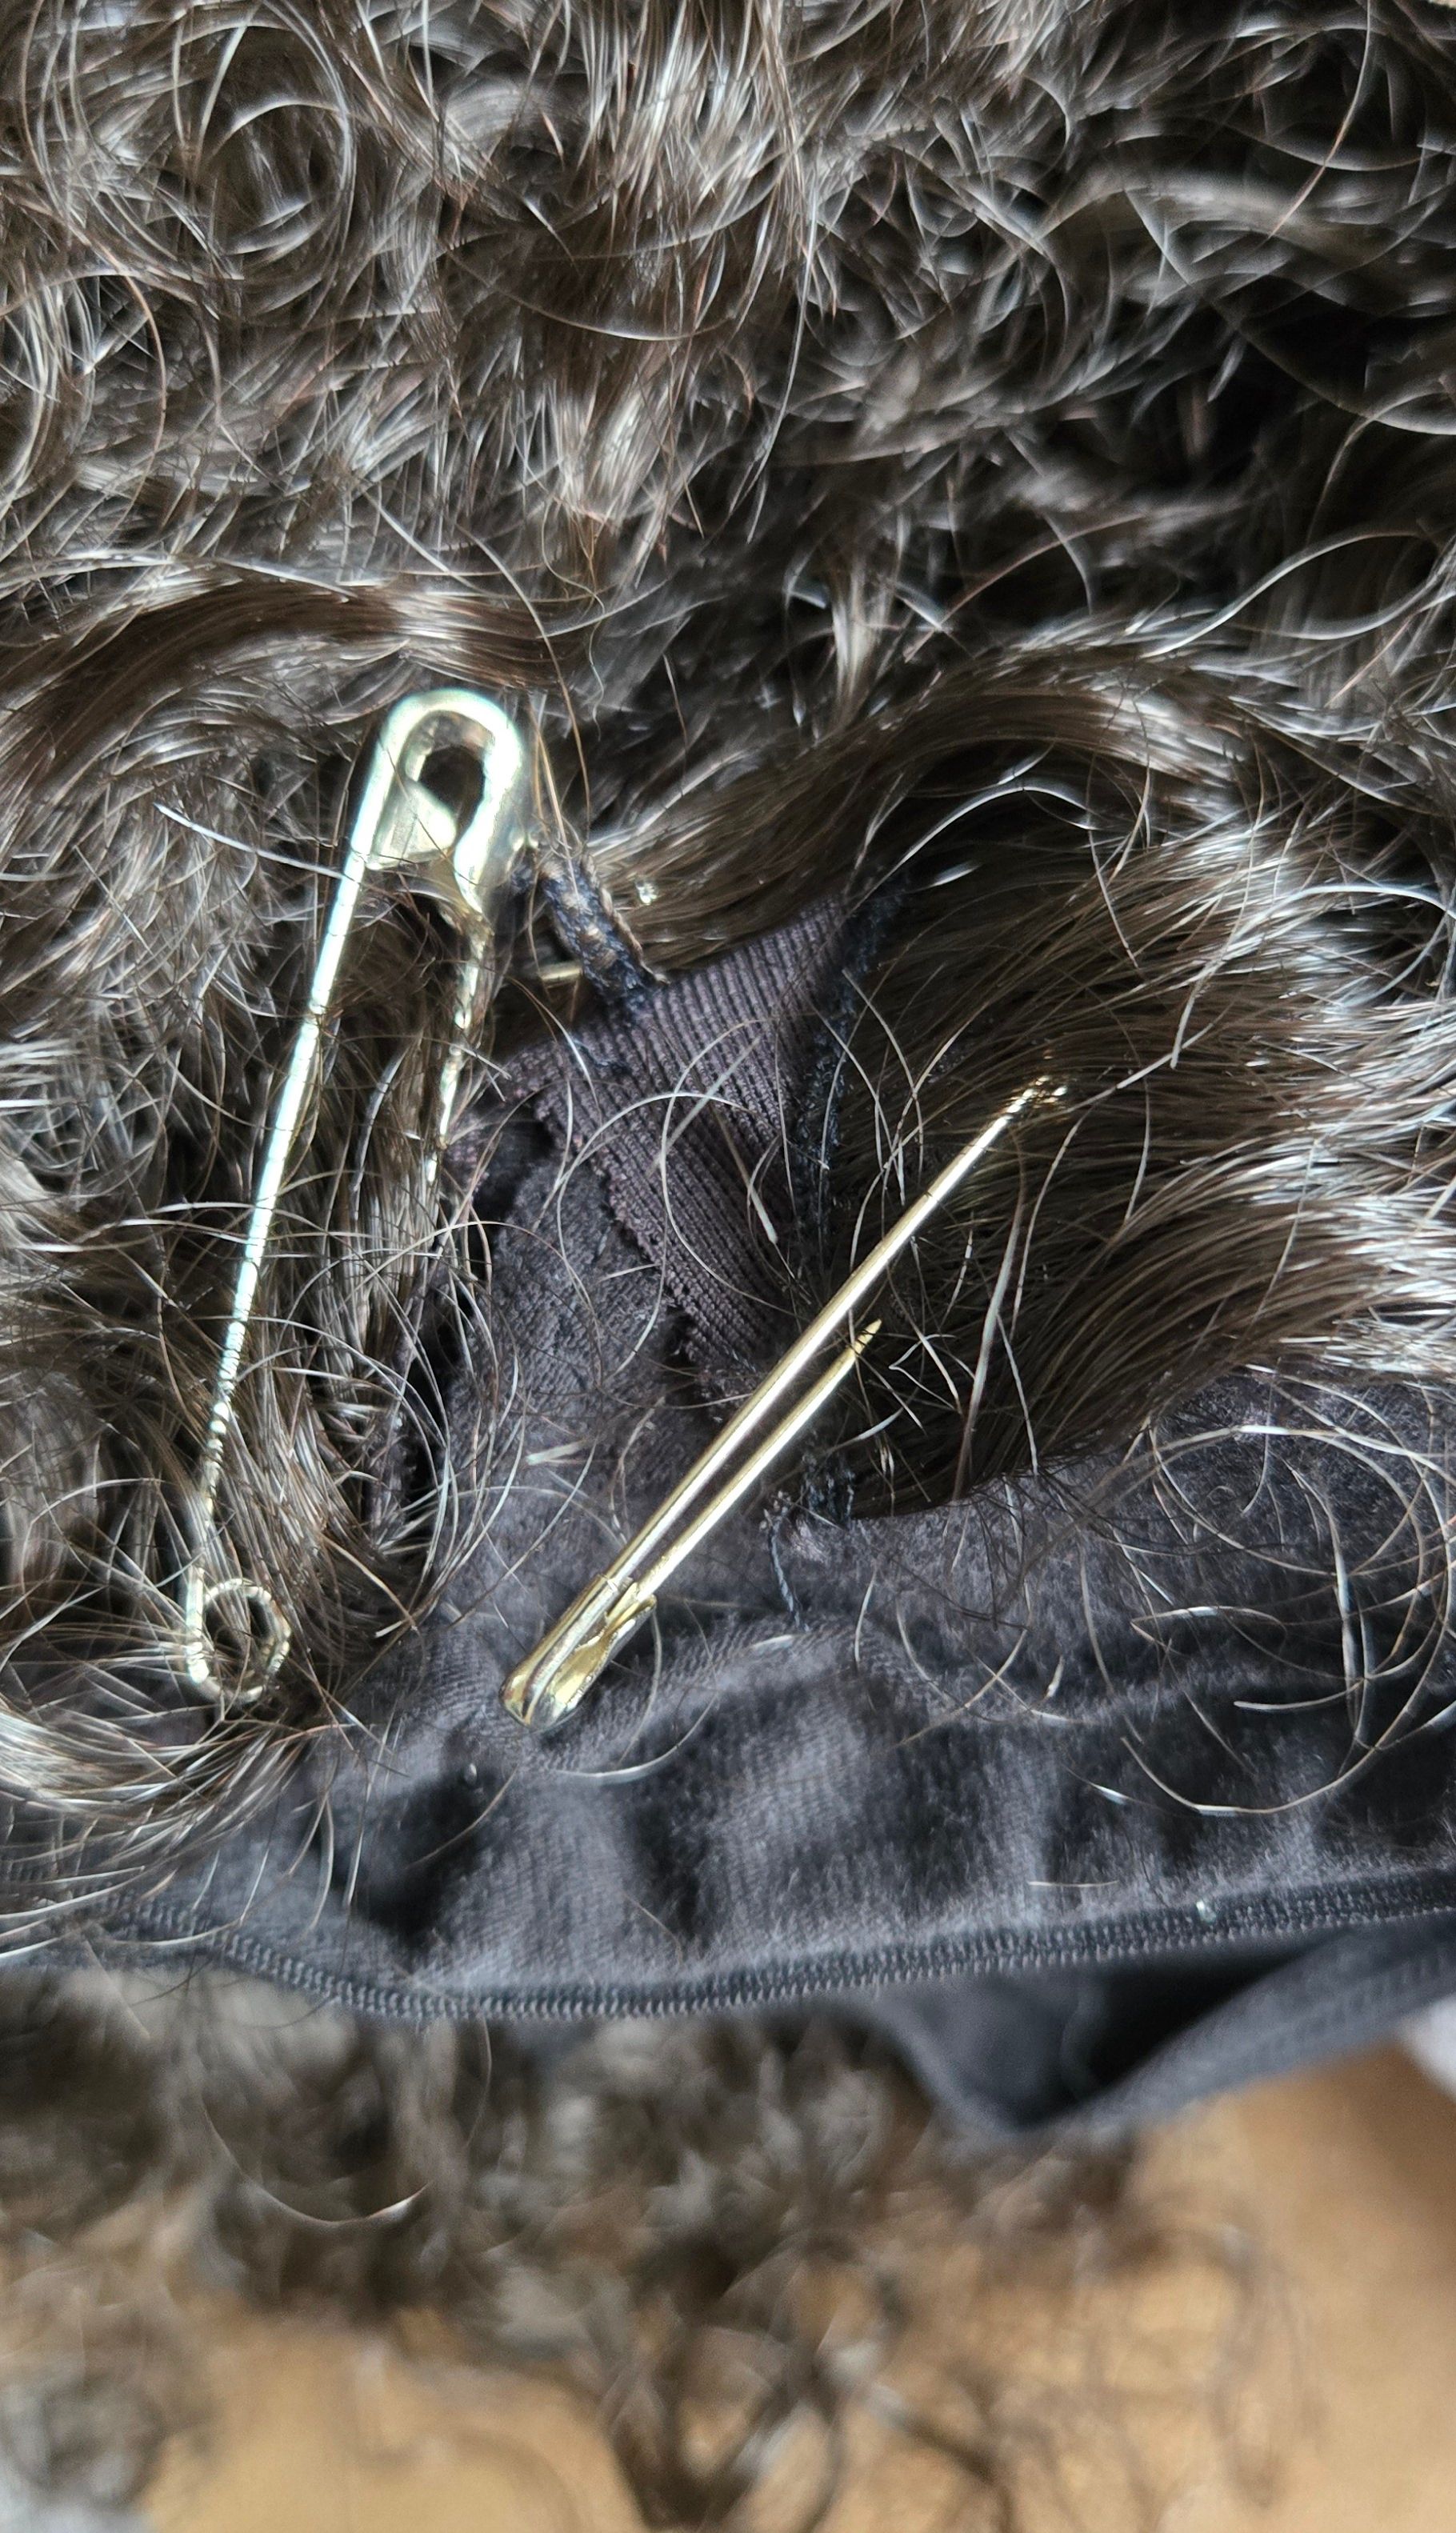
Next, the shop made wig cap was pinned securely to Adelaide's head and the split wig pinned in place. A thin ruler was pushed under to ensure the wig was not pinned to Adelaide, who was already tired of it all. Safety pins held everything nicely and saved the stitcher from stabs and pokes.
It was easy to see the pins on the inside of the cap. It was not easy to stitch from the cap side without catching up the curls once in awhile. But is was managed, securing the splits along all the edges while checking often to ensure all curls were stitch free.
A bigger and less tight stitch, with double thread, allowed the wig and cap to stretch in those areas. Tea breaks were needed.
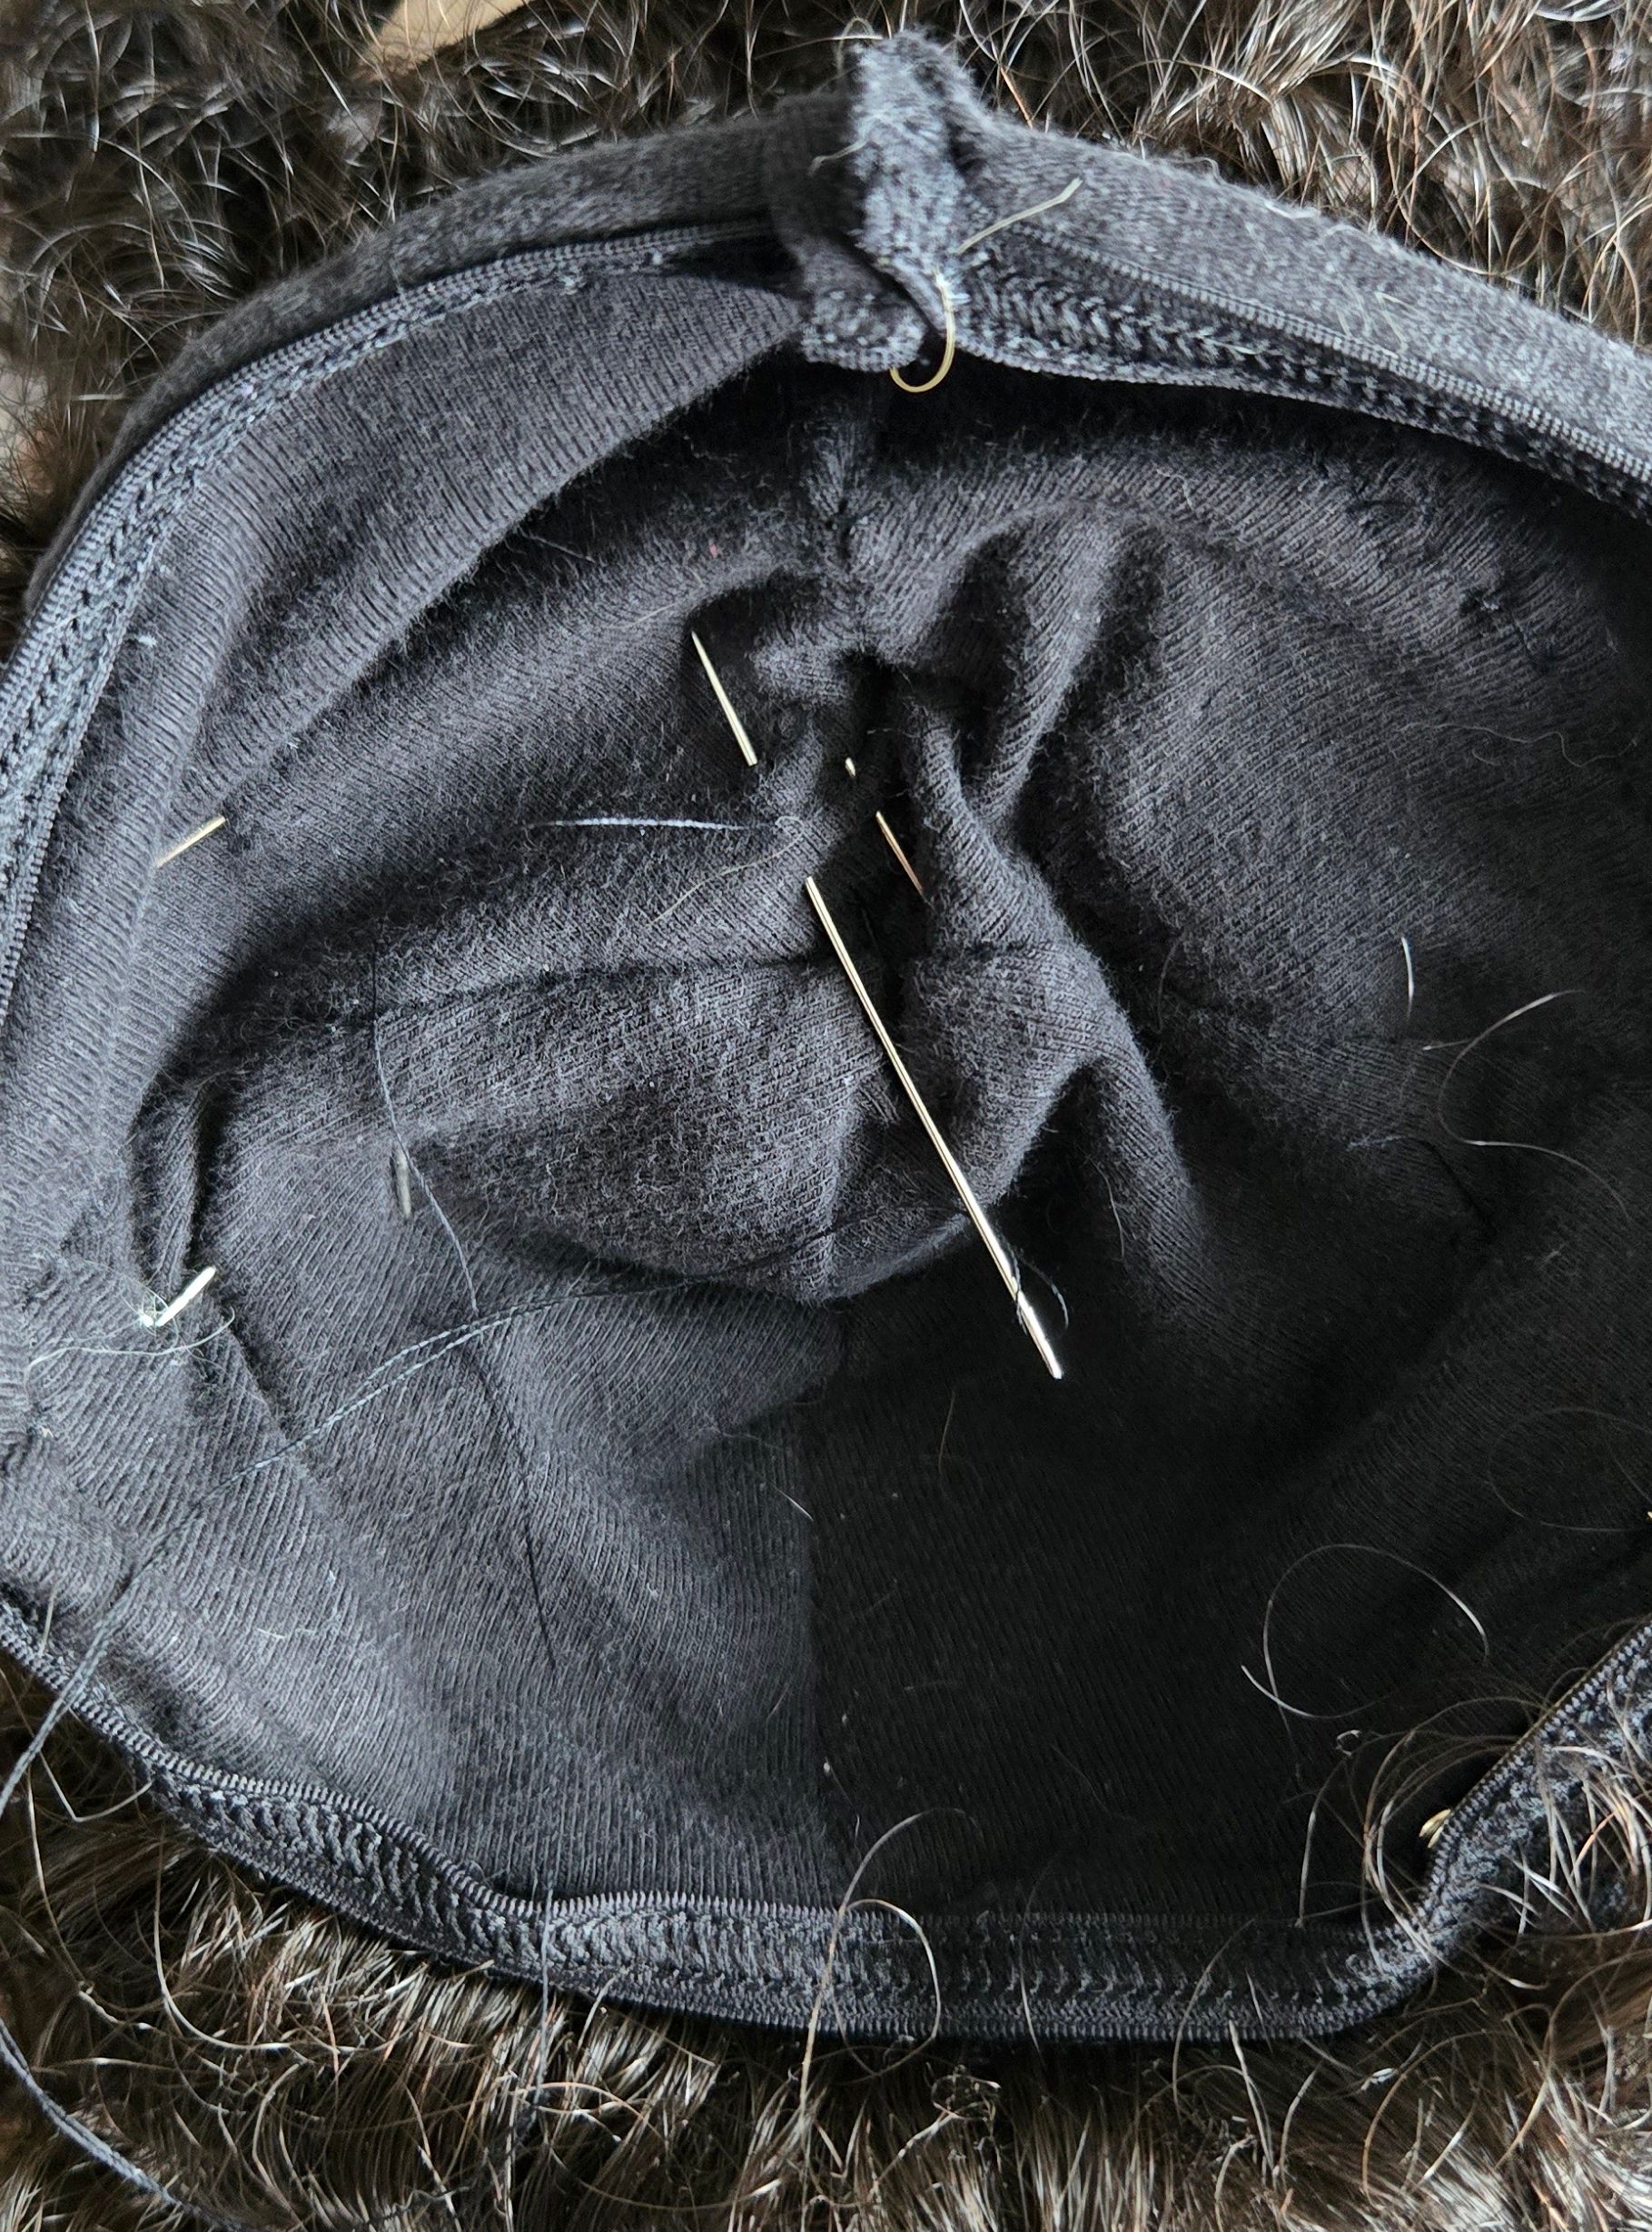
Finally it was time to restitch the wefts back into an appropriate space.
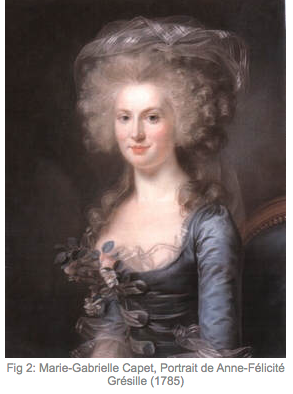
Knowing the hairstyle research the designer had chosen, the wefts were placed at the front and side front of the cap. This left a bare space at the back showing only the wig cap itself. That would be taken care of by the chosen style. Below is an example of the Designer's research.
https://lifetakeslemons.wordpress.com/tag/hedgehog-wig/
The elastic around the cap's edge had to be flattened out while stitching, so the wefts could be butted right along the fold without catching the elastic. They were sewn in place so that the weft would fold up and become part of the hairdo. Like magic.
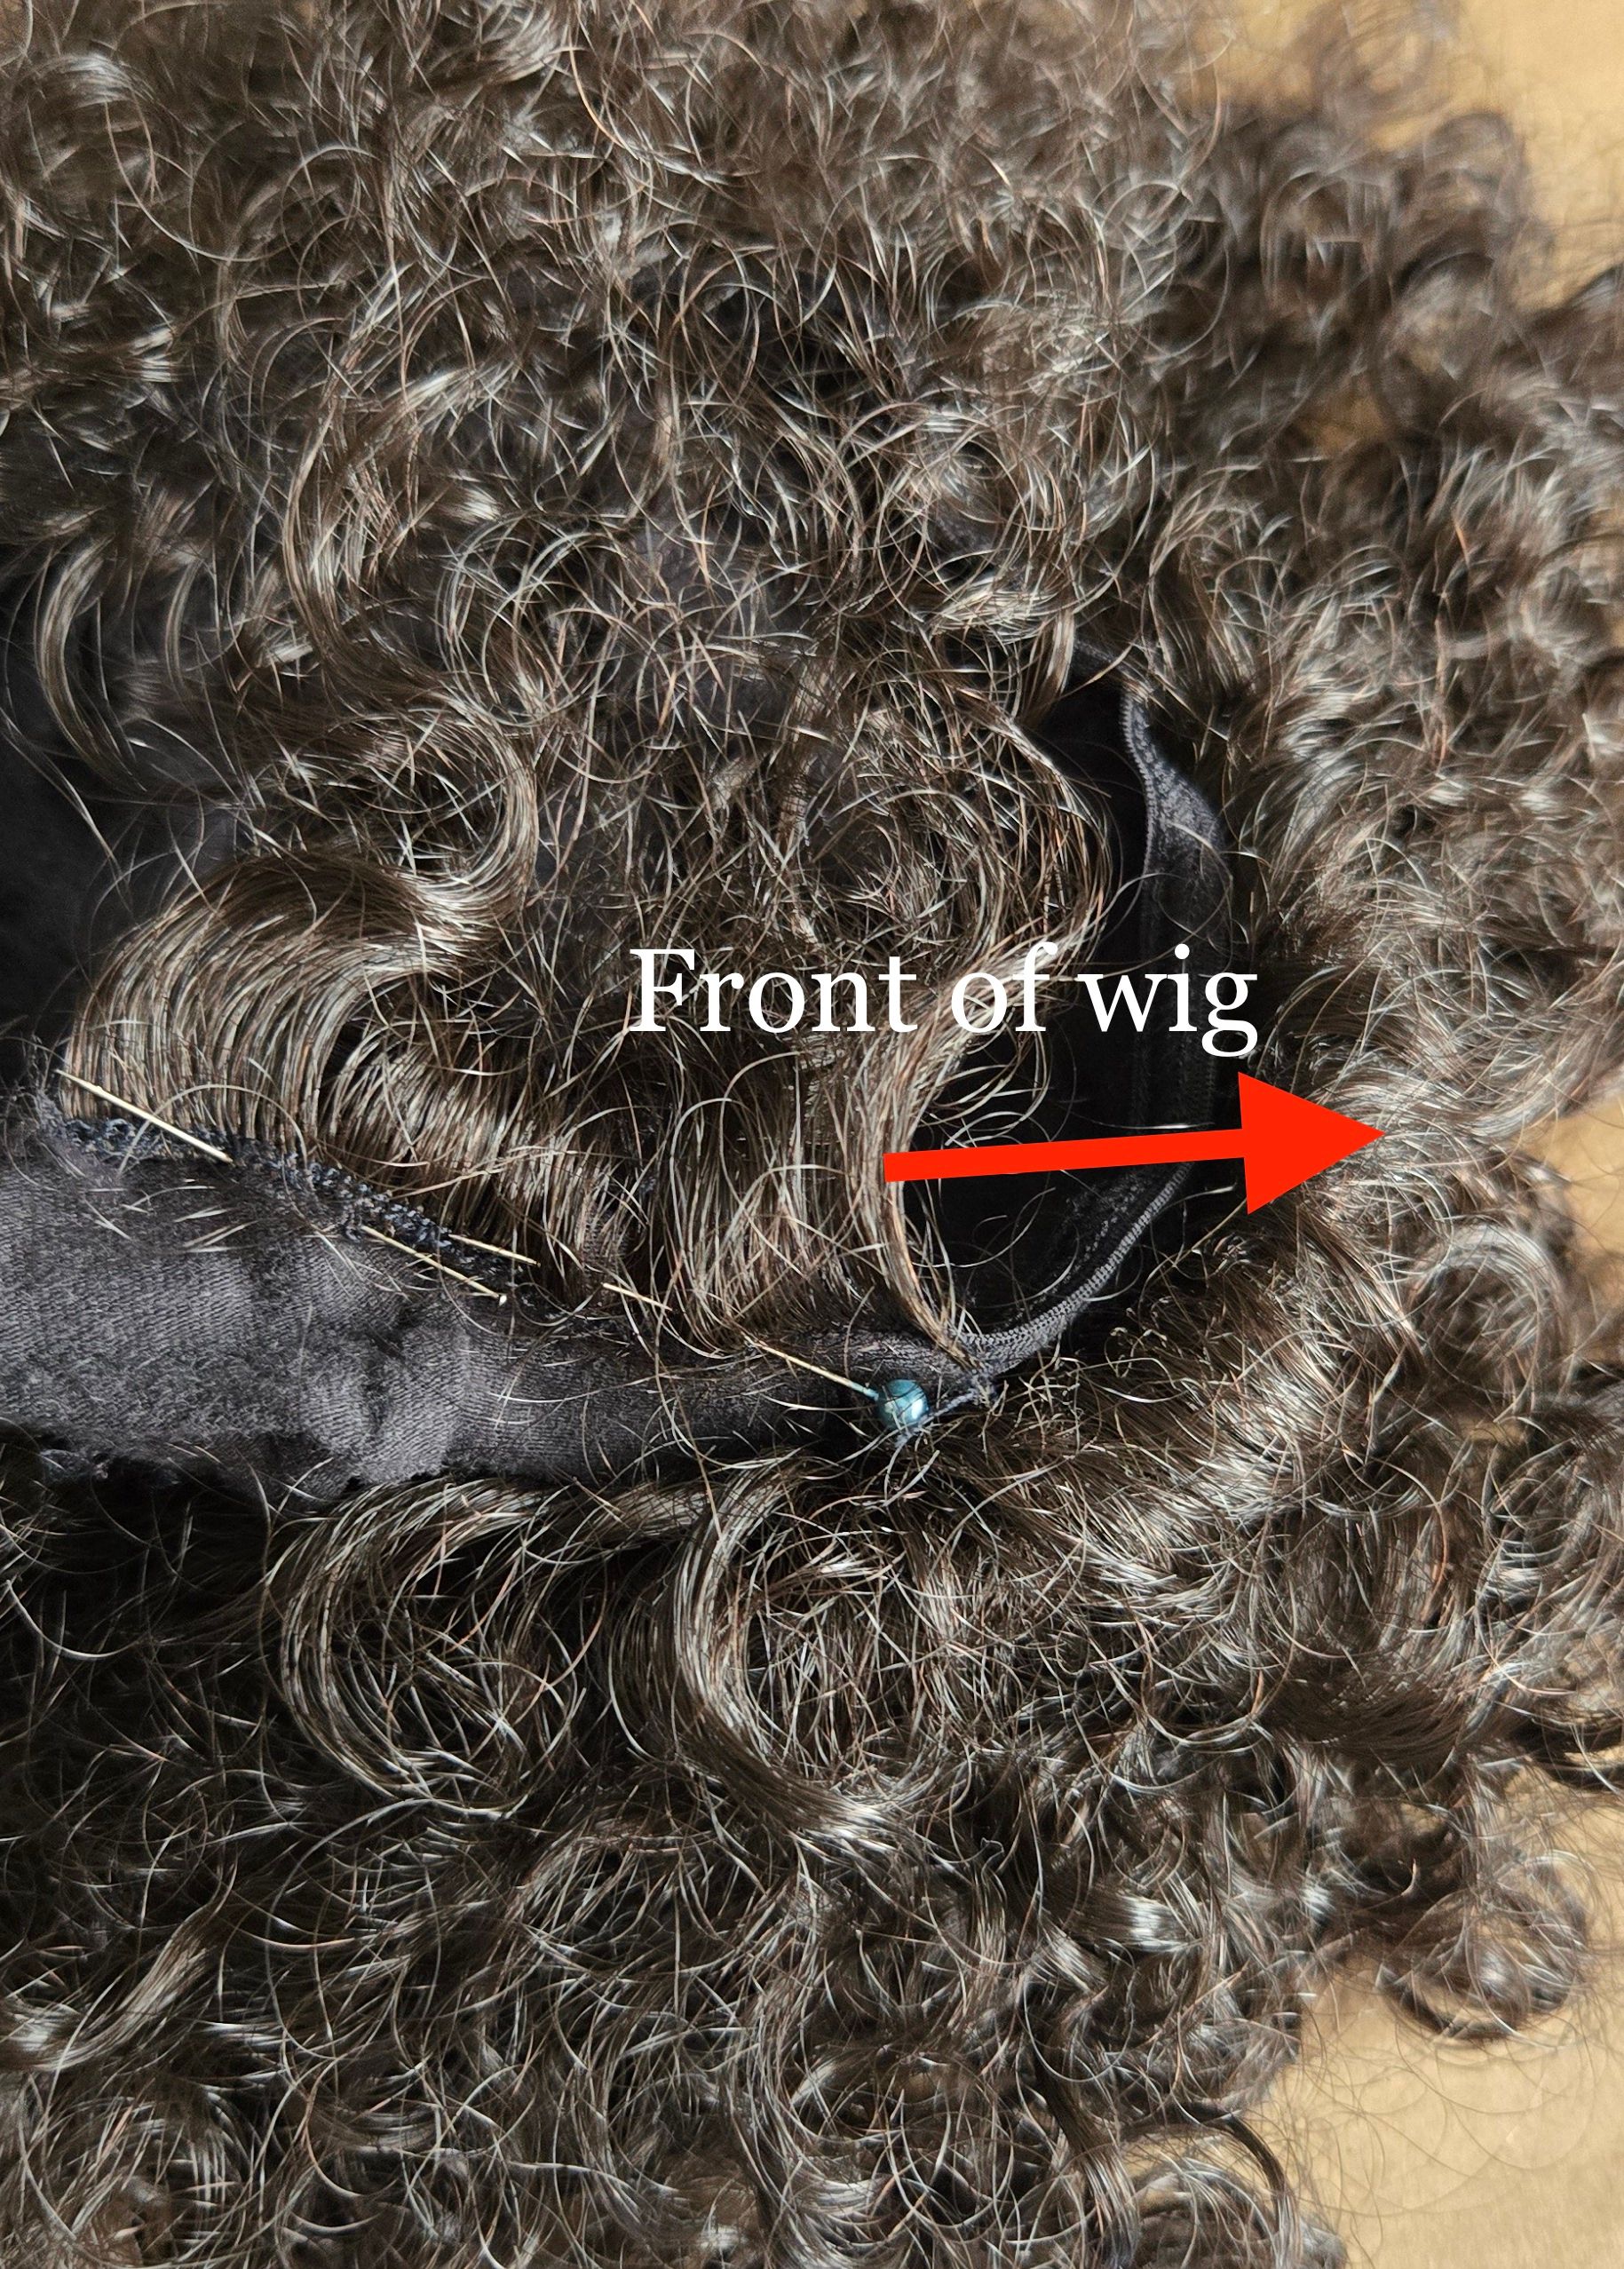
It was not fun stitching the wefts securely without getting tangled in the curls. It would have been helpful to put a hair net on the rest of the hair. Hindsight is twenty-twenty. But when it came to styling, the wefts blended in nicely. HINT: It's easier to find sewing pins that have a pearl bead on the end.
You may have noticed that the second wig is not mentioned. There was no need to use it, but it was nice to know there was back up. So, it is now restocked, waiting for a smaller lucky lady.
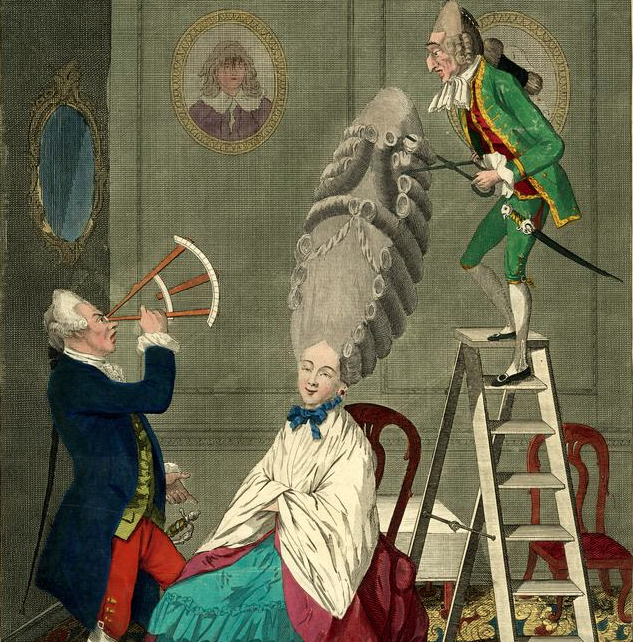
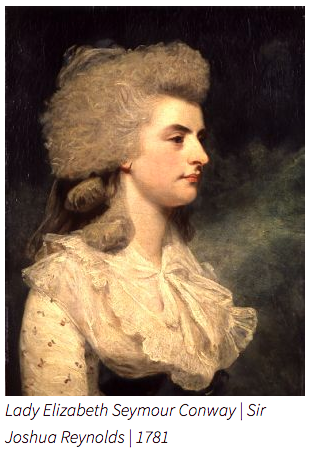
Now the hairstylist took over the rest of the work. Referencing the information in Kendra Van Cleave's book on 18th Century hair styling, the bushy Plume style on page 247 was the perfect choice. It is a style popular in the 1780's. The book is listed in the Resource section.
Here is another portrait reference for what many resources call a Hedgehog style.
This took a LOT of time. There is great information in the Van Cleave book on how to prep and style wigs in general and that chapter was poured over many times. Youtube also has videos on refreshing and styling synthetic doll wigs. And those were reviewed as well.
Onward! The stylist kept a spritzer bottle of warm water handy, a comb, along with the toothbrush for combing gently, and a wet brush for more rigorous straightening. A small hand held garment steamer was put on standby.
The newly altered wig was placed correctly on Adelaide's head with little fuss, and then pinned securely with the beaded sewing pins.
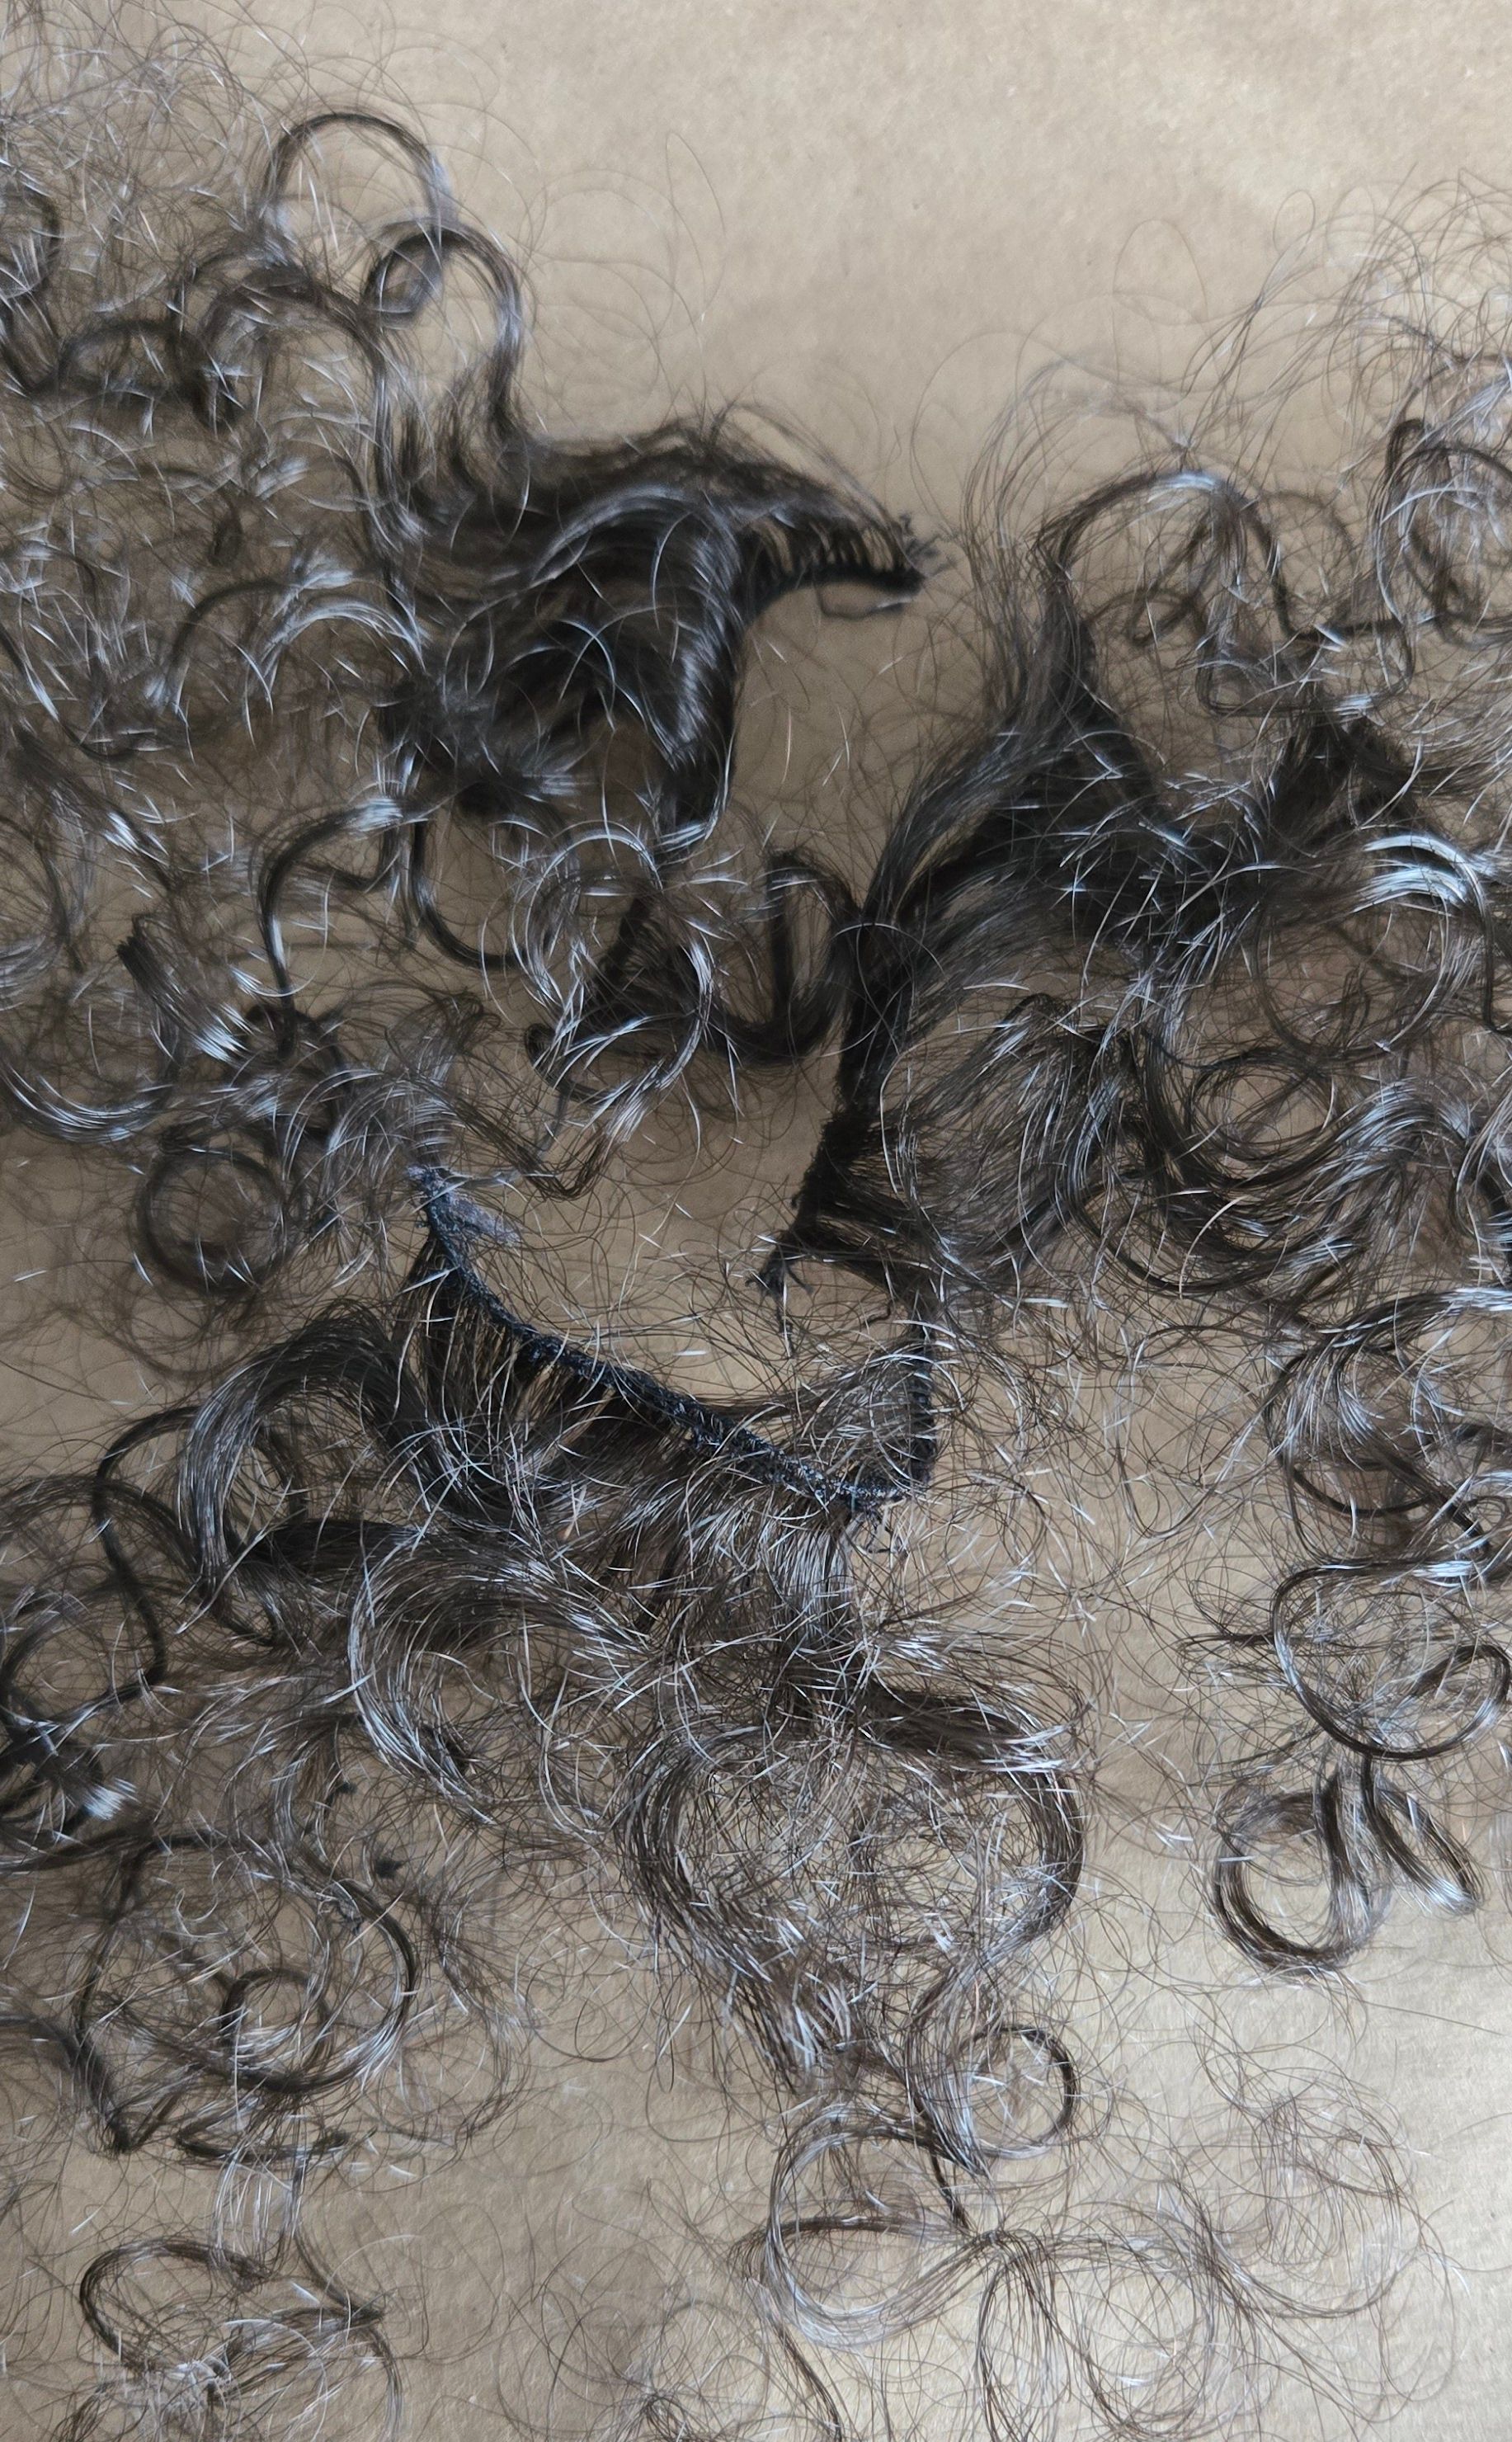
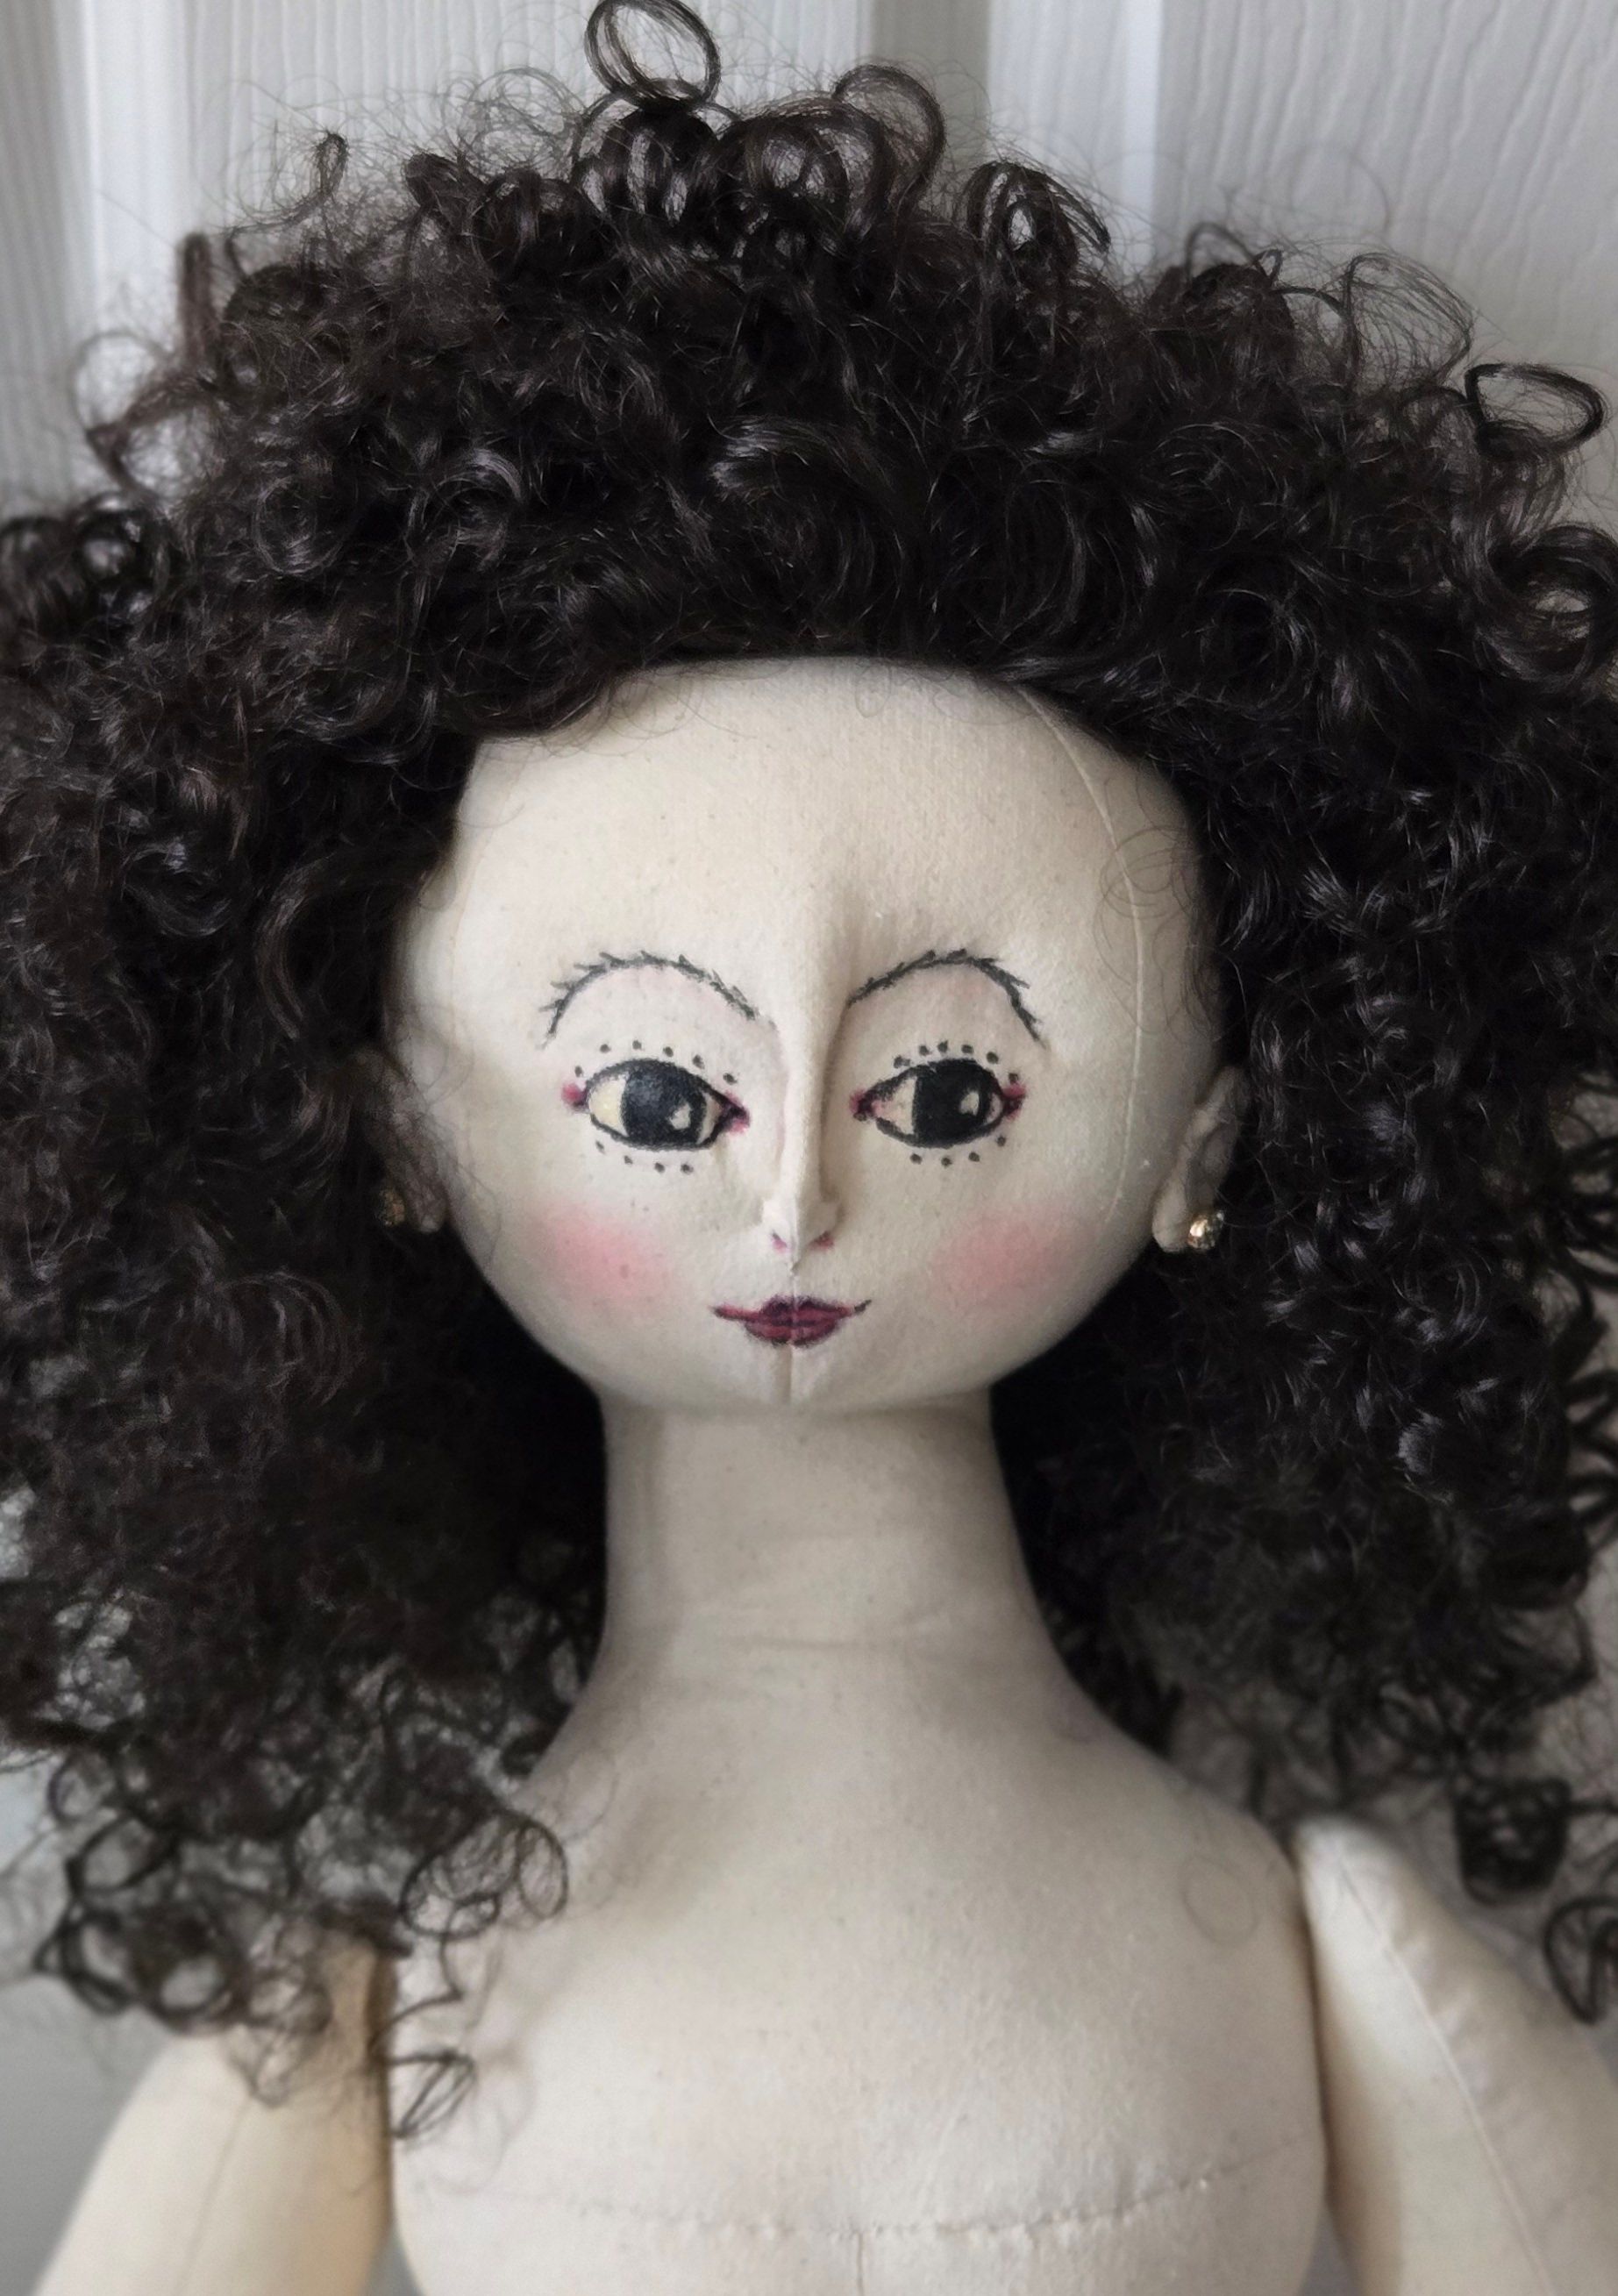
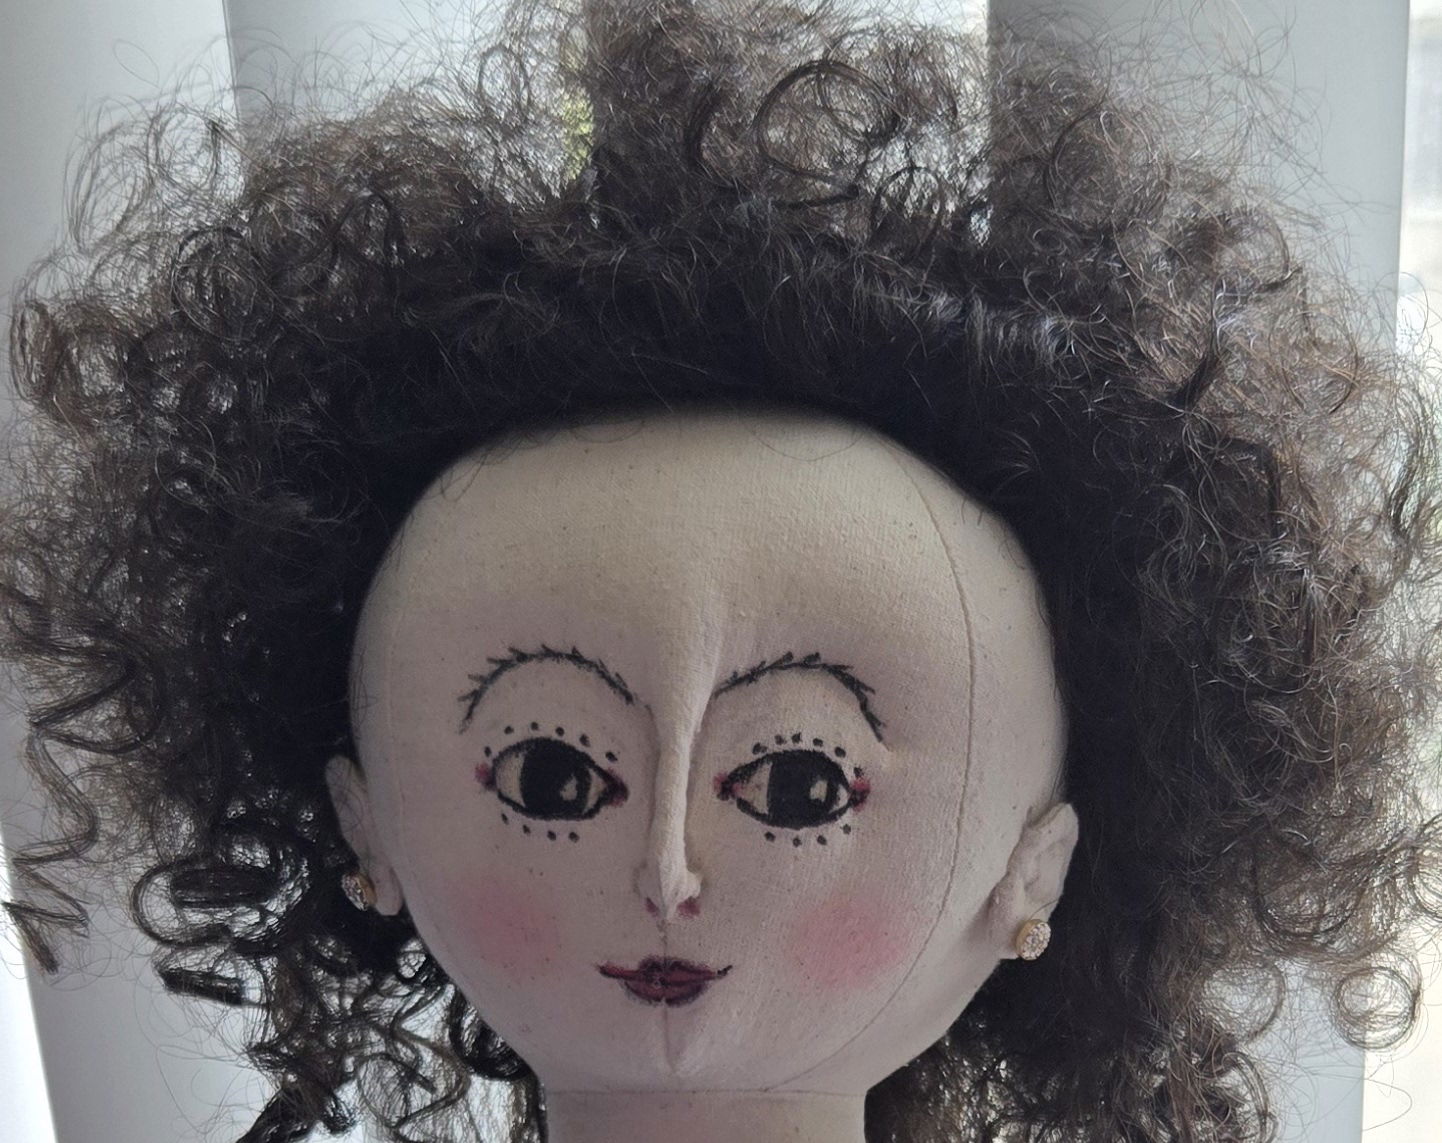
Here is what the wig looked like prior to styling.
The front, sides and top of the wig were teased only a little, leaving some curls intact. The wig automatically began to frizz as soon as it was handled and this actually worked in our favour.
The front, side front wefts and some from the back were then pinned in place using small bobby pins available at any major drugstore. They come in lots of colours. But sometimes it does require a search.
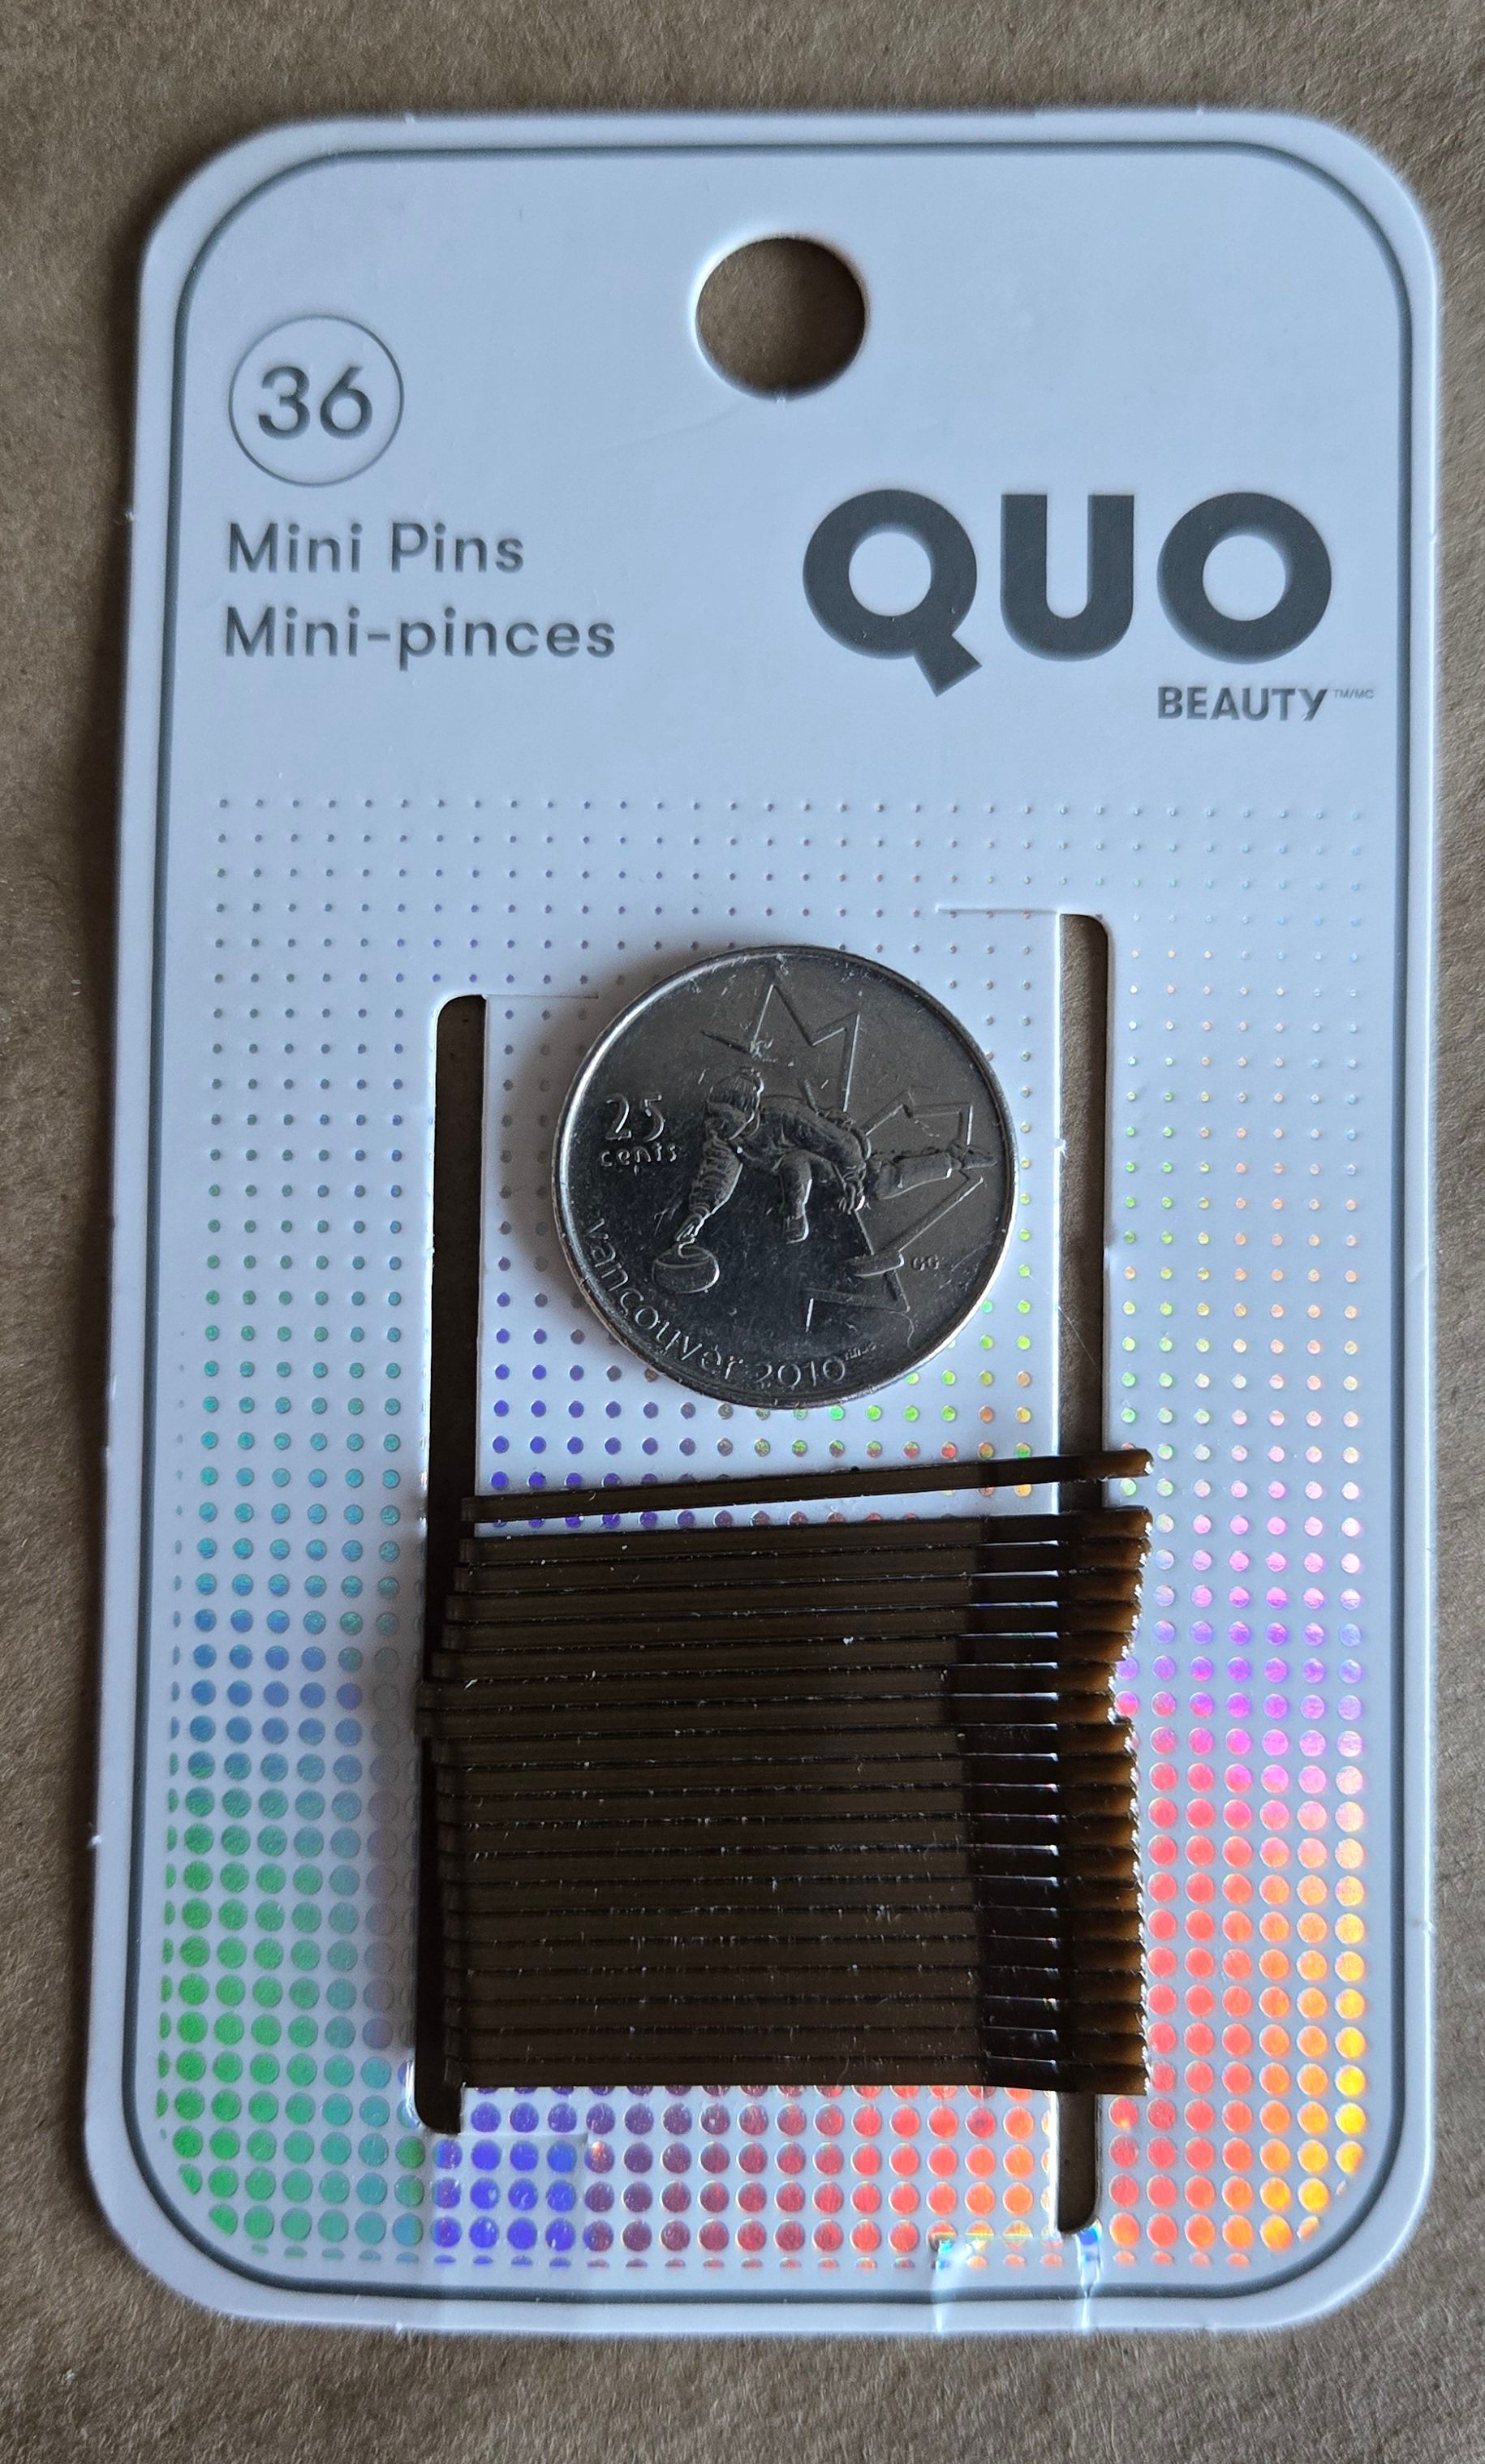
(We added this quarter not only for scale, but the face has a person Curling on it. Get it? Curling? Never mind.)
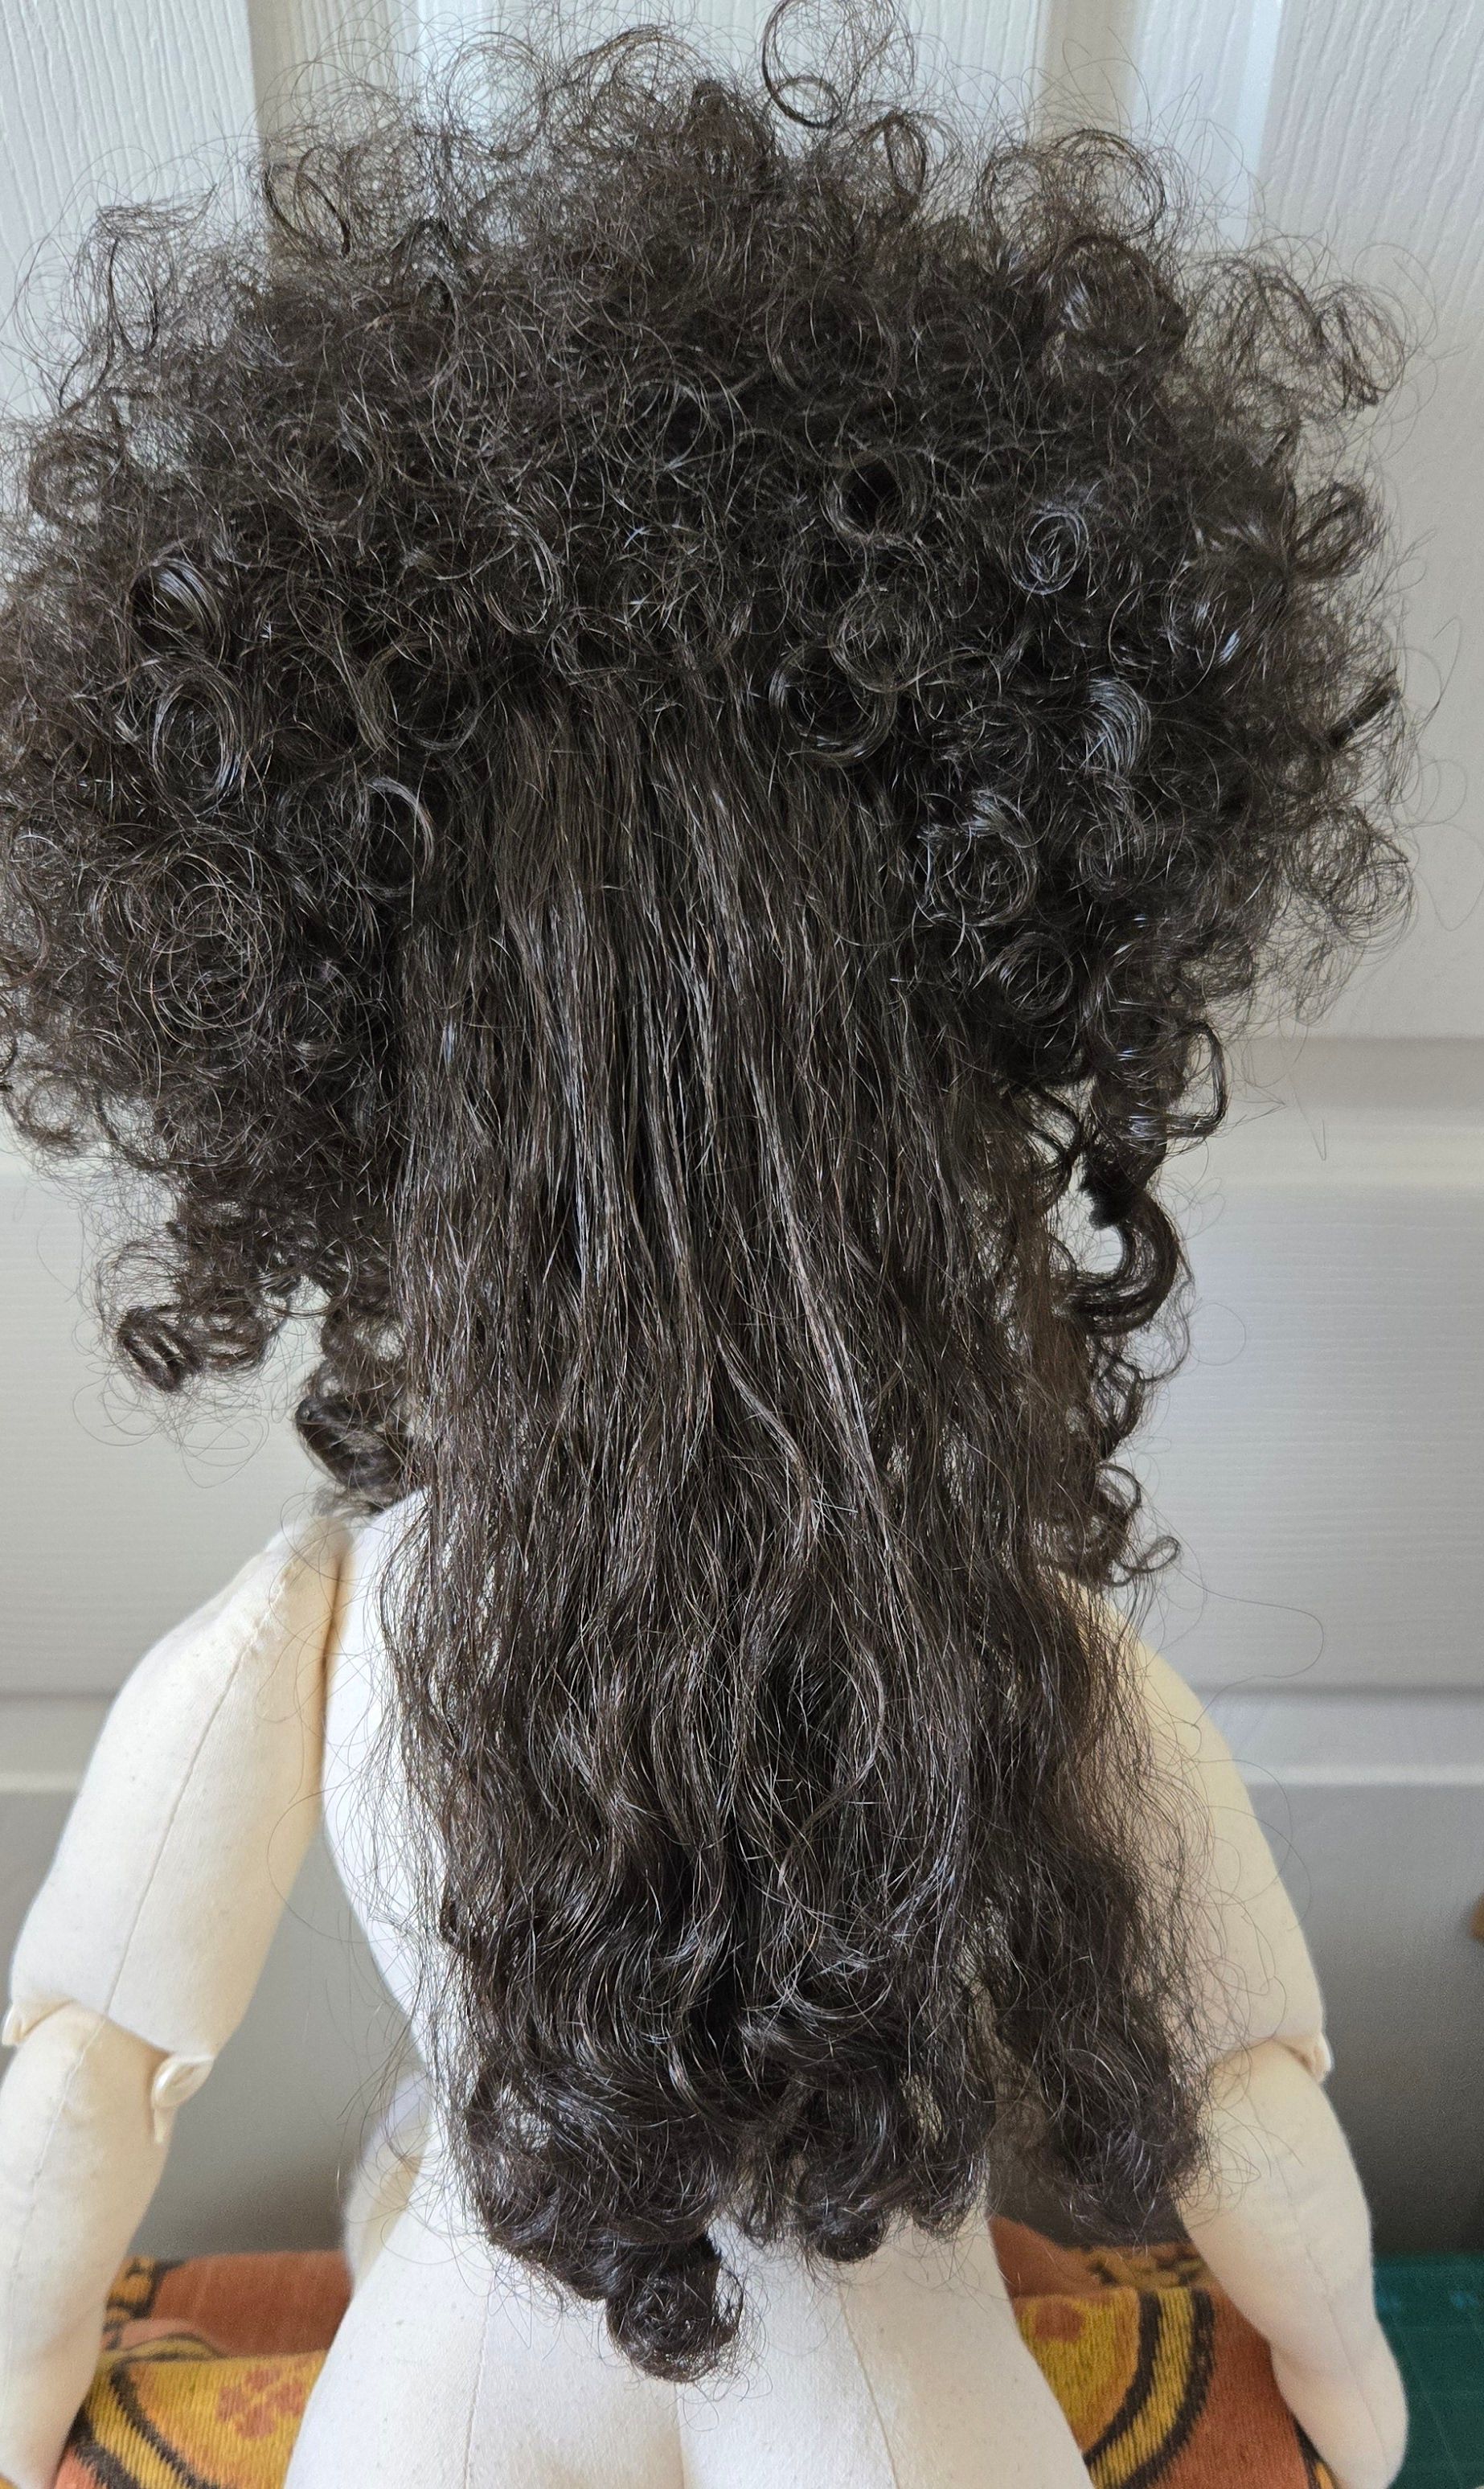
Then the chignon at the back, or Fall as we now say, was separated out carefully and had to be combed to straighten it one bit of weft at a time. A healthy spritz of warm water came first before any work was attempted. The toothbrush was then used for a start, followed by the wet brush. Some, but not a lot of steam, was applied which helped to straighten the hair and left a bit of a wave. It is important not to get too close or too long with steam, lest you melt the hair. Not too many hairs were pulled out. But it did take a lot of time. HINT: Wrap the doll up in a towel and cover her face.
Two long locks were then separated, curled and held with a bobby pin to form the long ringlets hanging over the shoulders. Pin curls! The rest was brushed out as straight as possible and the bottom rolled a few inches, using a barrette as a curler and to give weight to the Fall. The curls were spritzed first and then steamed gently.
All this was left to dry at least two days.
Now the finishing touches. A bit more teasing. Releasing the curls on the Fall and ringlets. Stray fuzz and loose hairs were snipped off. Then after covering Adelaide's face and body, a healthy dose of hairspray was applied.
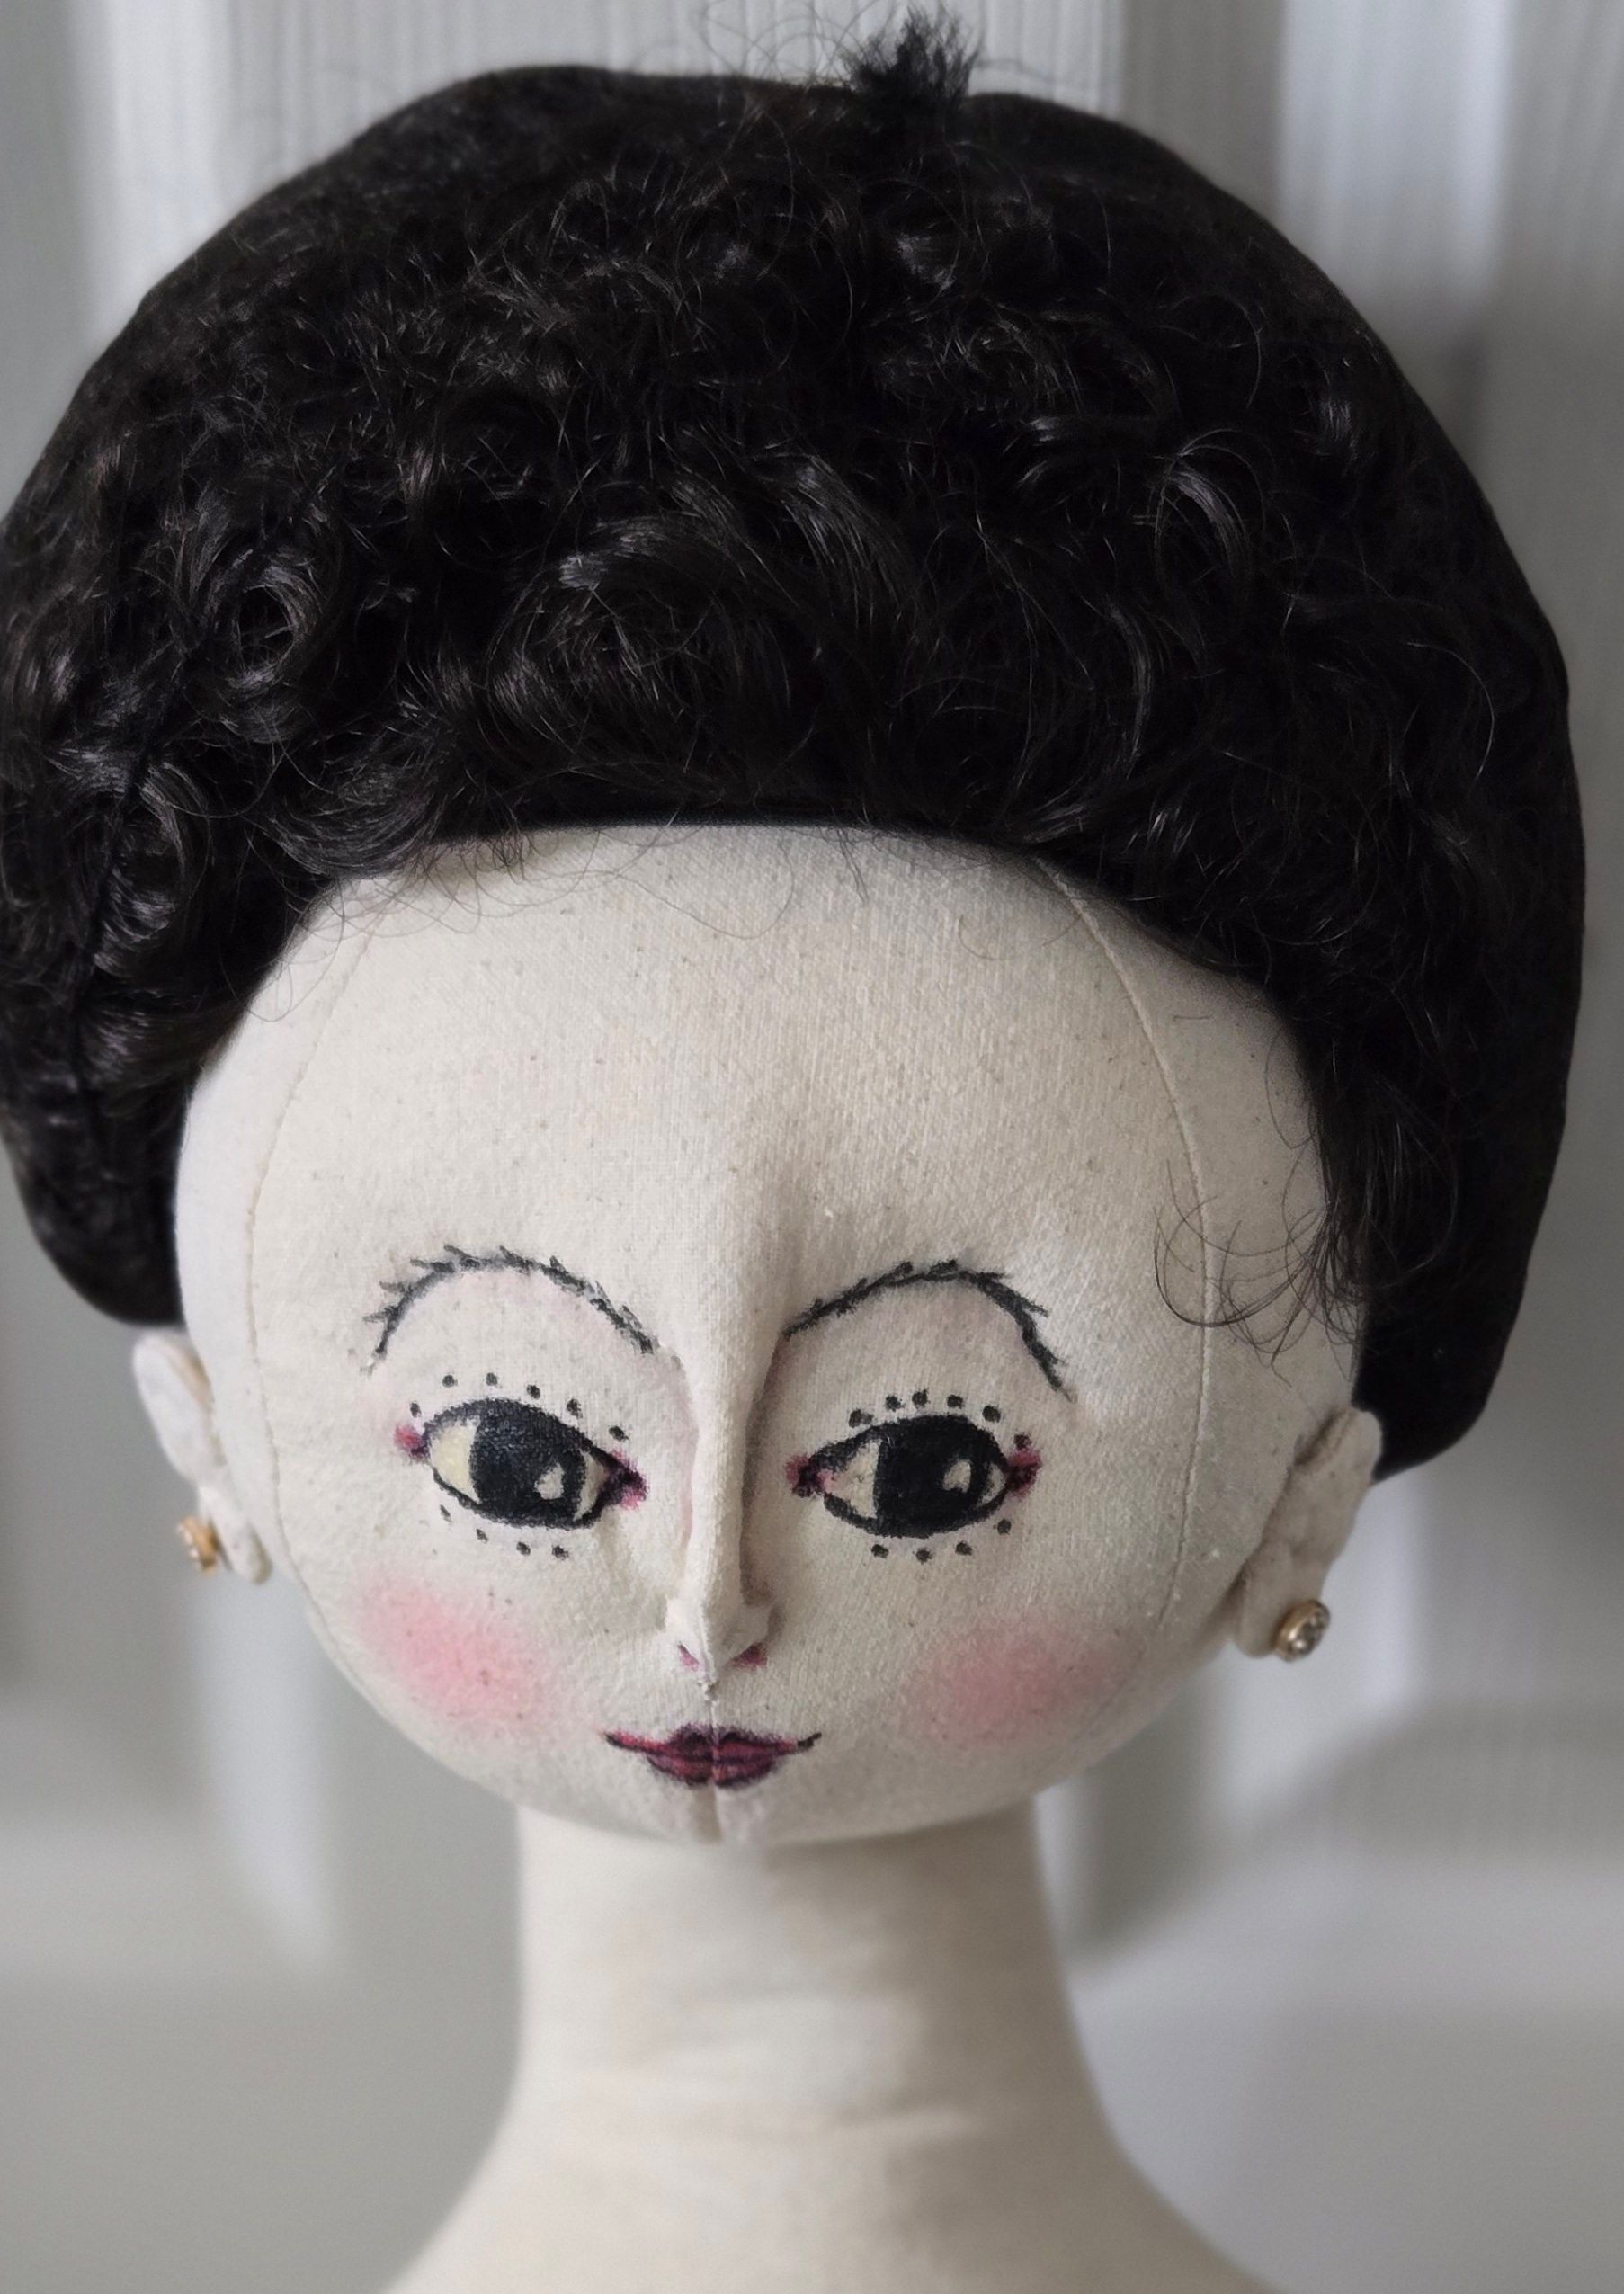
Voila! La Hedgehog.
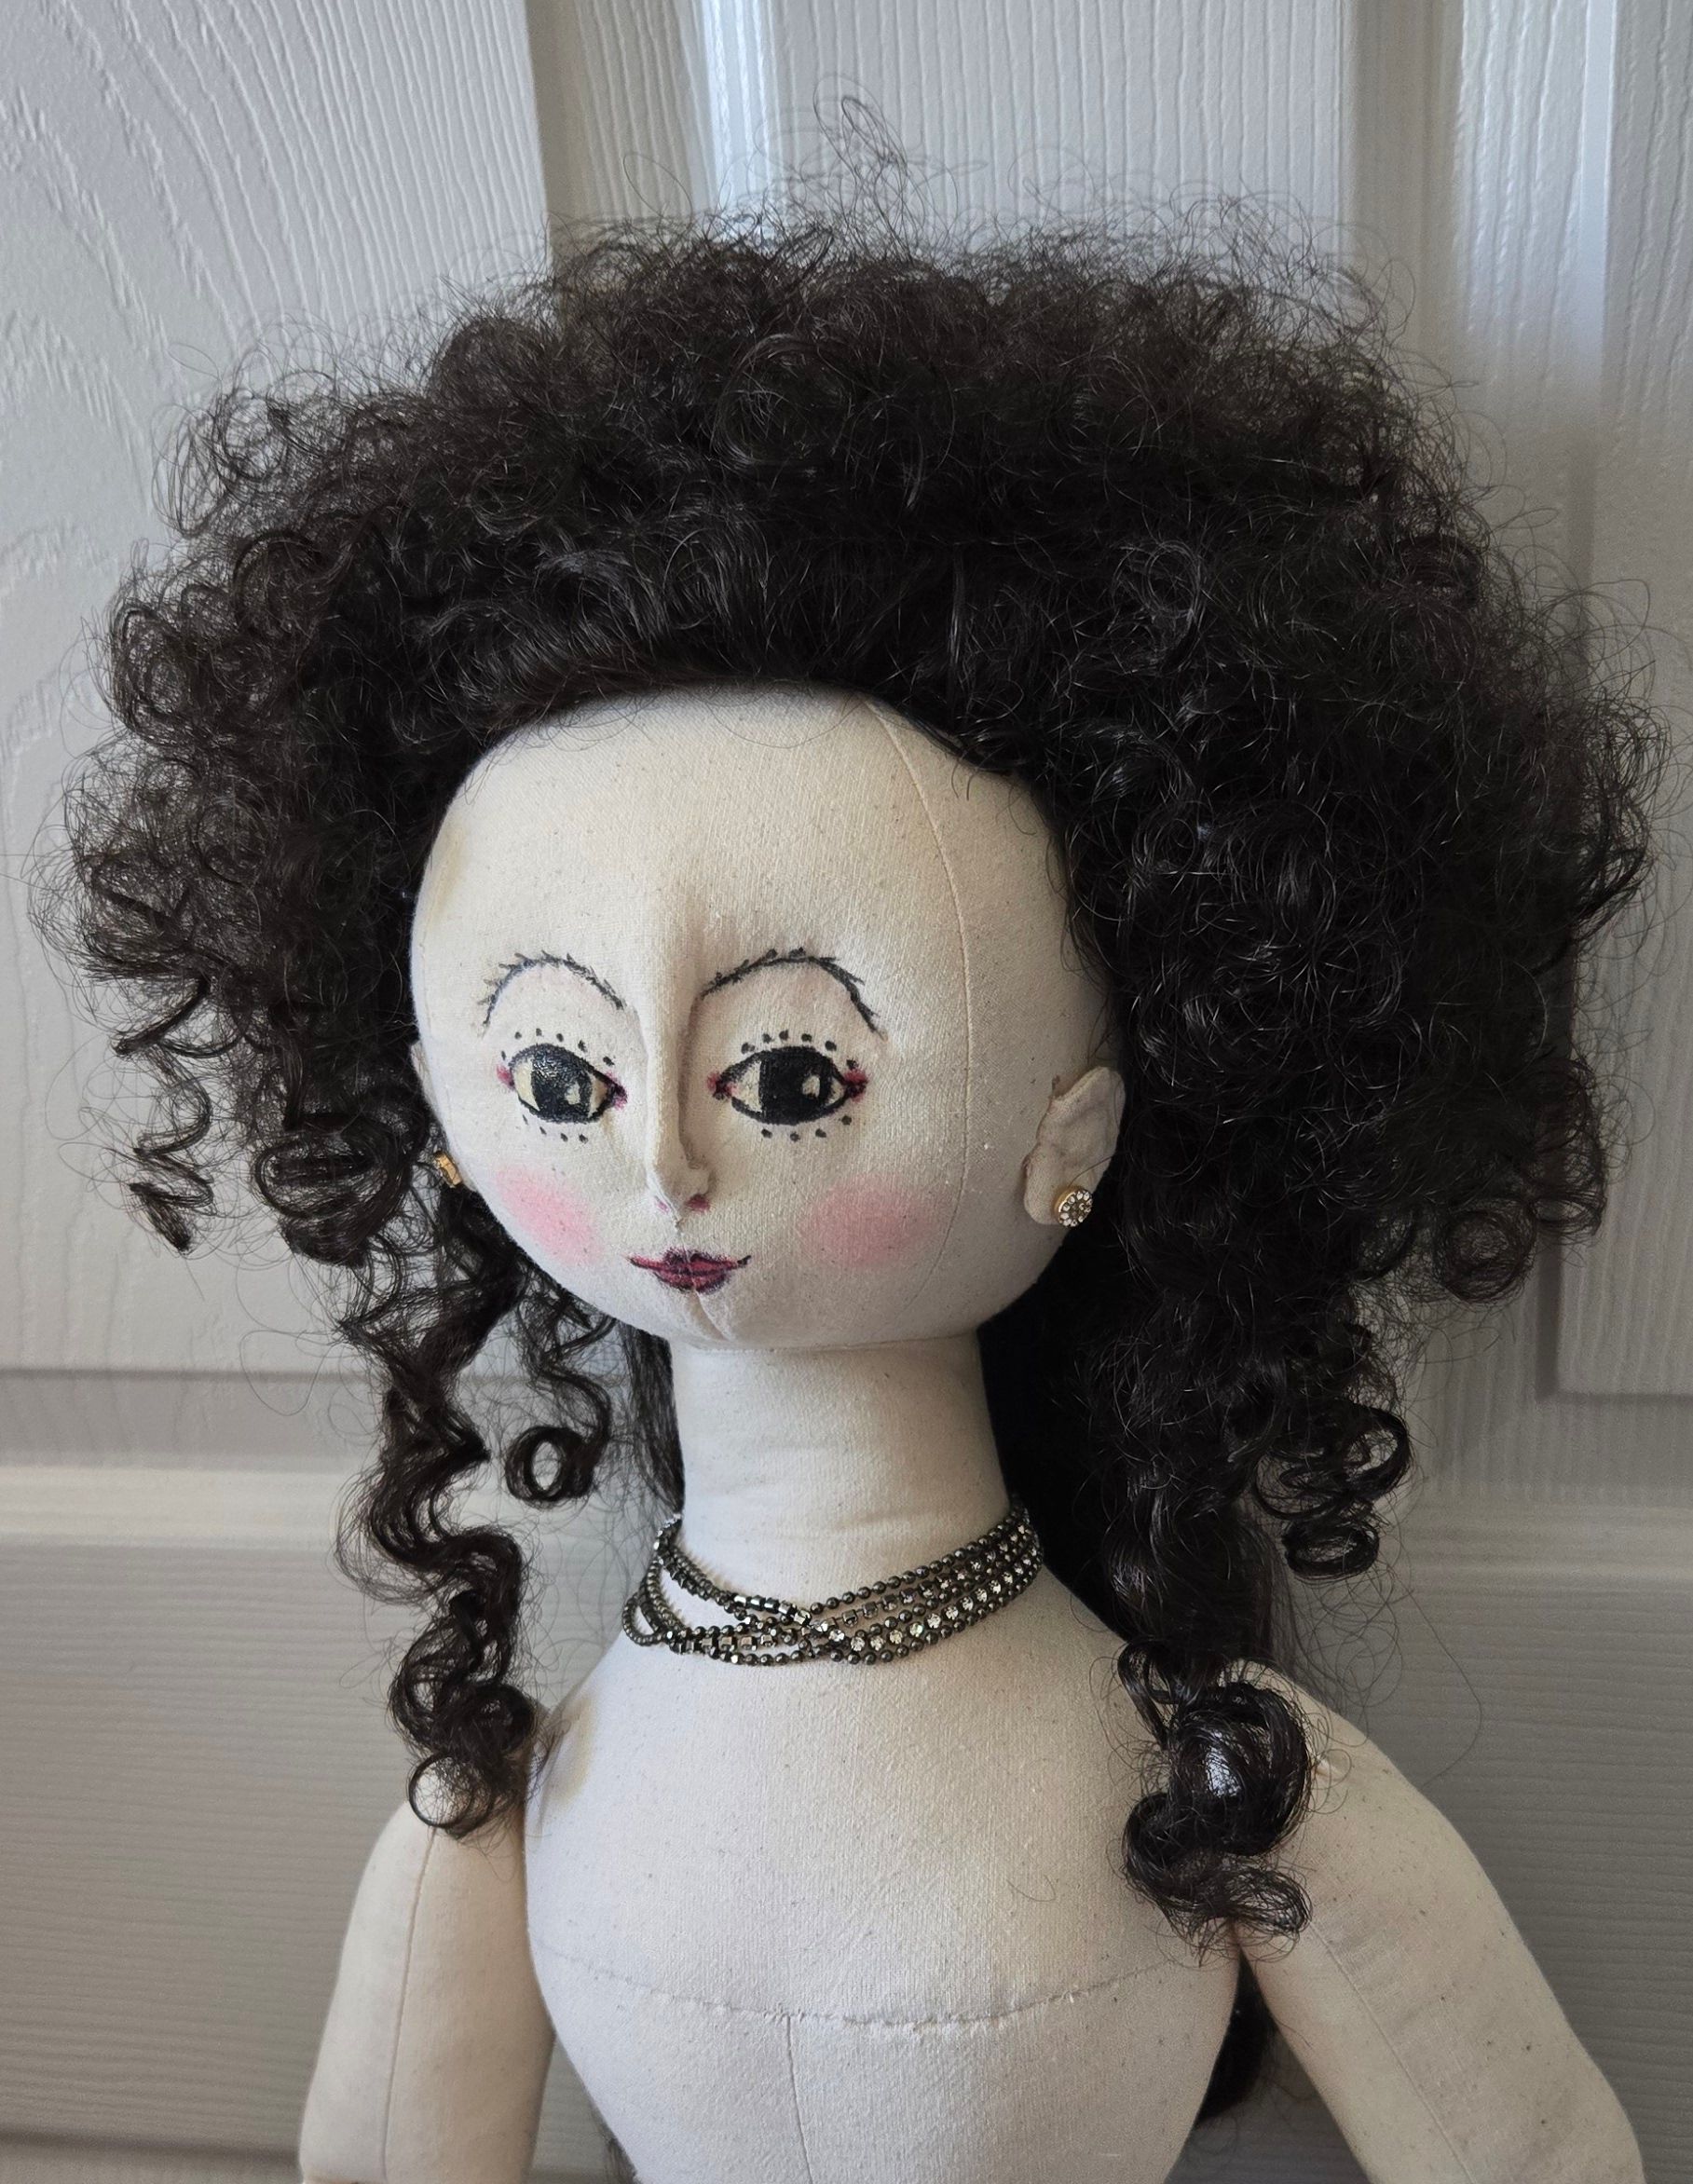
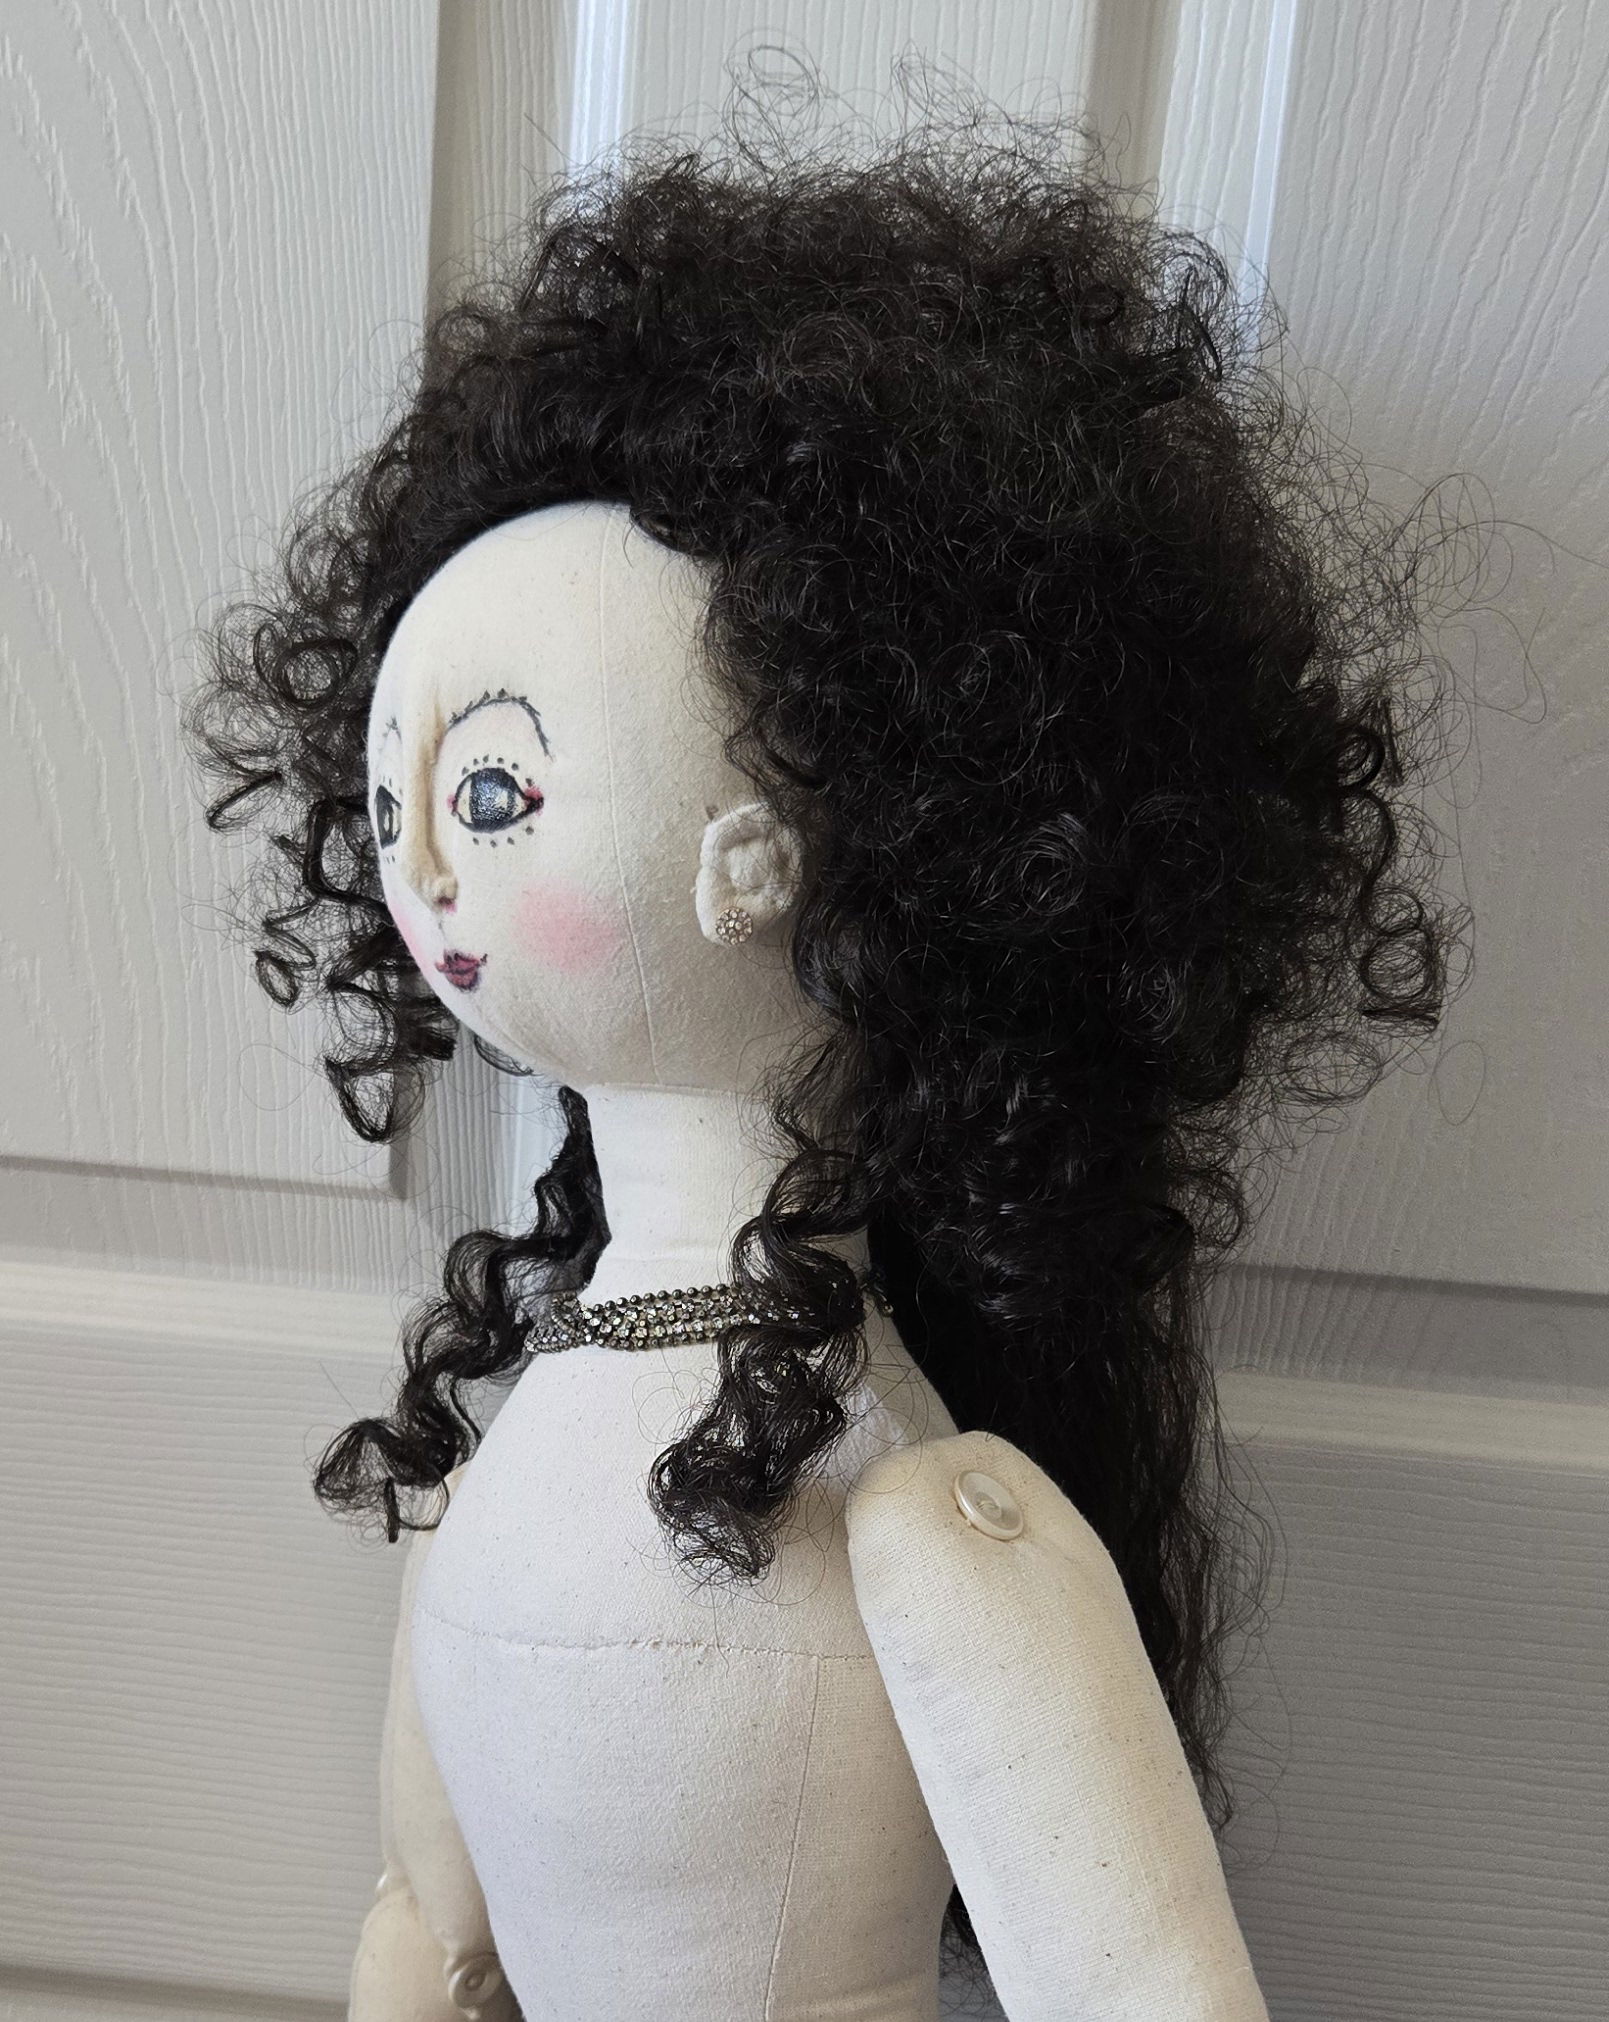
Over all, everyone is quite pleased with the result and the decision was made at last to make the wig removable. Adelaide will then be able to wear fashions from other decades. This entails a search by the buyer for larger sizes of wig lots from our usual sources. The wig maker is crossing her fingers that the right sizes are out there.
A note to the woodworker is on its way, asking for a proper wig stand. A big shoe box may have to do in the meantime. For now, Addy is happy to model her coiffure while waiting for an outfit to match it. She is already considering different ways to wear her new hat.
Please feel free to ask any questions you might have about this process or the research. The wig maker did have some experience with maintaining and styling wigs for Theatre productions, but there is always something new to learn. The Van Cleave book is terrific!
A picture of Addy and some of her clothing items will be posted shortly in the What's New and Gallery sections.